Fibaro Dimmer 2

Thanks. Will get some of those! May as well order a few things at the same time, if delivery takes a while. Do you have the link to the specific buttons you got? Always better to be sure they’re the ones you’ve used and know they work. Any recommendations for other Xaiomi products?

Thanks again.

Robin, if you don’t know the answer to this, maybe you can point me to the appropriate forum topic.

I have a number switched fused spurs for my bathrooms. All wired to a point outside the bathroom. One for underfloor heating, another for the electric towel rail, and another for a bathroom TV.

Do you know if I can operate these with a Fibaro Relay or Switch? It might be particularly useful if I don’t want to leave them on all the time.

Here are pictures of the front and back of the switches. I’m looking to use the Retrotouch ones to match my Wall Light Switches.

thanks!

Ok, so you mean leave the fused spur switch turned on, as unlikely to need to turn it off except in exceptional circumstances, and then control the TV with a Harmony remote?

Regarding your other comment, the underfloor heating and electric towel rails will each be on their own switch fuses. They each have programmable controllers so unlikely to look for Smartthings integration there. Only dimmable Downlights in the bathroom will be on a Fibaro.

Have TRVs in the bedrooms (Tado).

thanks

Amazingly got my Xiaomi buttons and Humidty Sensors 8 days from the date of order! Not tested them yet, but they look very neat for the price! Will let you know.

Robin - a non technical question for a change. Have you noted notable variation in the colour of the glass sections of your retrotouch light switches? I got some yesterday and the difference was notable. This will only be an issue when I place some switches side by side, which I will be doing. Especially 3 and 4 gangs. Here is an example of the variation:

Will do, thanks! Out of interest, which do yours better resemble in my pic. The more white 3 gang, or the off-white 1 gang? … and did you go for the plain (PG) or Chrome Trim (CT)? I changed my mind to go for the PG, as I feel these will blend a little bit better.

I’ve spent the last week fitting these to my house and while all mine have the same white plate, I have noticed a difference between the “light” in different batches - some are a blue/green where others are more yellowish. I’ll try get some photos that show the difference.

I also got 2 one-gang retractive switches where the “on” was wired to L2 and not L1 and this (still inexplicably) caused an issue when connected to a Qubino Dimmer but worked ok with Fibaros. I’ve also had a few where the retractive mechanism “sticks”

I’m a bit nervous about the quality of these. How have yours survived with time @anon36505037 ?

And where did you guys order yours? I got mine from https://www.directtradesupplies.co.uk

I went for the “naff” chrome ones :wink:

Here’s photos hopefully showing the difference in “light” colour.

The difference is definitely on the switches themselves - I had them sat side-by-side before installing them, but didn’t take a picture.

And the sticking has happened on a few prior to installing their backplate on the wall - in one case, it was like that out of the box, but it loosed up after taking the cover off and putting it back on a few times.

Not sure what you mean about the double-faceplate. I was replacing what was there and I didn’t want to have to cut new holes or have to patch the plasterboard, so replaced like-with-like. Here’s what the backbox is like:

Hi Robin,

I’m trying to sort out my bathrooms in terms of being able to dim the lights, and also operate an extractor fan.

Essentially, at least for now, if the lights are on (at this point at any dim level greater than zero) switch the extractor fan on, and once light dim level is zero, continue running extractor fan for a minute and then turn off.

I want to use a Fibaro Dimmer 2 for the lights, and a Fibaro Relay/ Dual Switch for the extractor fan.

I am happy to use CORE for this. So no direct wiring link between the light switch and the fan, just done with smarts.

But I am confused as to how the wiring needs to be set up. I have separate junction boxes for the lights, so the Fibaro Dimmer 2 will be housed in these, and not in the Switch.

Do I need a separate physical switch for the fan (distinct from the Fan Isolator Switch), and wire the Fibaro Relay behind this switch?

If you have any pictures of the recommended wiring, it would be greatly appreciated.

thanks!
David.

Maybe to make it easier for you. Having done a little reading, I think the standard wiring (ignoring Earth) is with Neutral, Loop (so both Neutral and Loop permanently live) and Switched Live going to the Extractor Fan via the Isolator Switch (the Switched Live attached to the Timer terminal on the Extractor Fan).

I guess what I am trying to work out is how to wire the Timer terminal on the Extractor Fan if this wire is no longer to come from the Light Switch’s switched Live?

How do I get a Fibaro Relay attached to this Timer terminal? My connections to the lights are coming from Junction Boxes which house the Fibaro Dimmer 2s.

Hopefully that helps?

thanks
David.

Anyone able to help? If extractor fan has three terminals, if I only want it to work with logic from CORE and thus turn on and off as a result of CORE logic, do I just wire the Live and Neutral, and leave the Switched Live unwired. Then connect the Fibaro Relay (or Fibaro Switch) to the Live (effectively turning it into a Switched Live!)?

As I understand it, the third Switched Live terminal (or Timer terminal) is required to turn the extractor on as a result of turning on the physical light switch, and then the extractor fans runs for a certain period (say 15 minutes) and then switches itself off. But all my timer logic will be in Core, so assume I don’t wire the Timer (or Switched Live) terminal of the extractor fan.

I guess I don’t even need an Extractor with a built in Timer?

thanks
David.

@anon36505037

Realise you may no longer be tracking this. Don’t blame you! But just in case it’s because you’re not getting notifications, have tagged you. I’ve been reading some of your posts regarding controlling Blinds and similar motors. I will have plenty of blinds and motorised rooflights so might be analysing some more of your posts shortly. I move into our new house in about 6 weeks now, and that’s when I’ll be able to experiment more fully and hopefully don’t break anything!

David.

Thanks, and understand. I guess that was the part that is confusing me. If you set the timer to zero, won’t the timer turn the fan off as soon as it is triggered? Or does 0 effectively mean the timer is disabled? Would CORE not work if the extractor fan didn’t have timer functionality and a Timer terminal?

I believe the Extractor Fan I’m getting is 240V. It’s the VENT-AXIA VASF100T.

Thanks again, makes sense as always. If it turns out that It is sending down 12V down to the timer, does it become an issue for the Fibaro Relays to Control? Is there a solution?

The reason I went for the Vent Axia is that the reviews suggested it is by a reasonable distance one of the quietest fans. 14dBA.

If I got a fan similar to yours with just Switched Live and Neutral, wouldn’t it likely have the same set up in terms of 12V being sent to the fan? - albeit to the Switched Live and not the Timer? Or does it appear to only be for fans with Timers, that 12V is sent to the fan?

Got it working Robin. Thanks again for your help. The Fan is exceptionally quiet, even on the highest setting. The problem I have is that the Vent Axia fan is not flush. This is particularly a problem with the one bathroom we are ceiling mounting it, and will be less obvious when wall mounted. Will look for good looking flush alternatives, but don’t expect this site to give interior decorating design tips!

@anon36505037

Robin, know you busy and I’ve seen quite a few related topics, but none that appear to address my concern fully, so perhaps you can get away with just pointing to one you think answers my question. But first you need my question!

My lights and extractor fan work great, so thanks! Now on to Motorised Windows (Roof Lights) and Blinds.

I have EOS Rooflights that have switches with Open/Stop/Close. The switch is a WUI 110 Ventilation Keypad from WindowMaster. To open you push the Open button and release, and it opens fully. To close you push the Close button and it closes fully. To get them to Open or Close to an interim point, you use the Stop button when Opening or Closing. The controller is the WUC102.

They have transformers and 24V is supplied to the RoofLights.

I have attached the diagram of available connections in the WUC102. I am wondering whether I can attach a Double Relay to 1 (Open) and 2 (Close). Not sure what I’d attach to 6. It appears to say something about 0V, so not sure whether you can attach relays to these?

I don’t necessarily want a physical switch, so would just be interested in connecting relays and controlling with smarts.

Any help you can provide will be greatly appreciated. Don’t want to destroy the motors!

In case others are searching for this, we solved this. Used the Fibaro Double Switch and connected Q1 to a Schneider Electric Minuature Relay, and Q2 to another Schneider Relay. Then connected one of the Schneider relays to the Up terminal and the other one to the Down terminal of the Rooflight controller.

Then configured the Fibaro Double Switch to auto turn off S1 (and hence Q1) after 40 seconds (the time it takes to fully open the electric opening rooflight) and similarly to turn off S2 (and hence Q2) after 40 seconds.

Now, triggering S1 via z-wave automation opens the rooflight. Triggering S2 via z-wave automation closes the rooflight.

All good!

1 Like

@anon36505037

My HA adventures continue. Mostly good I must say.

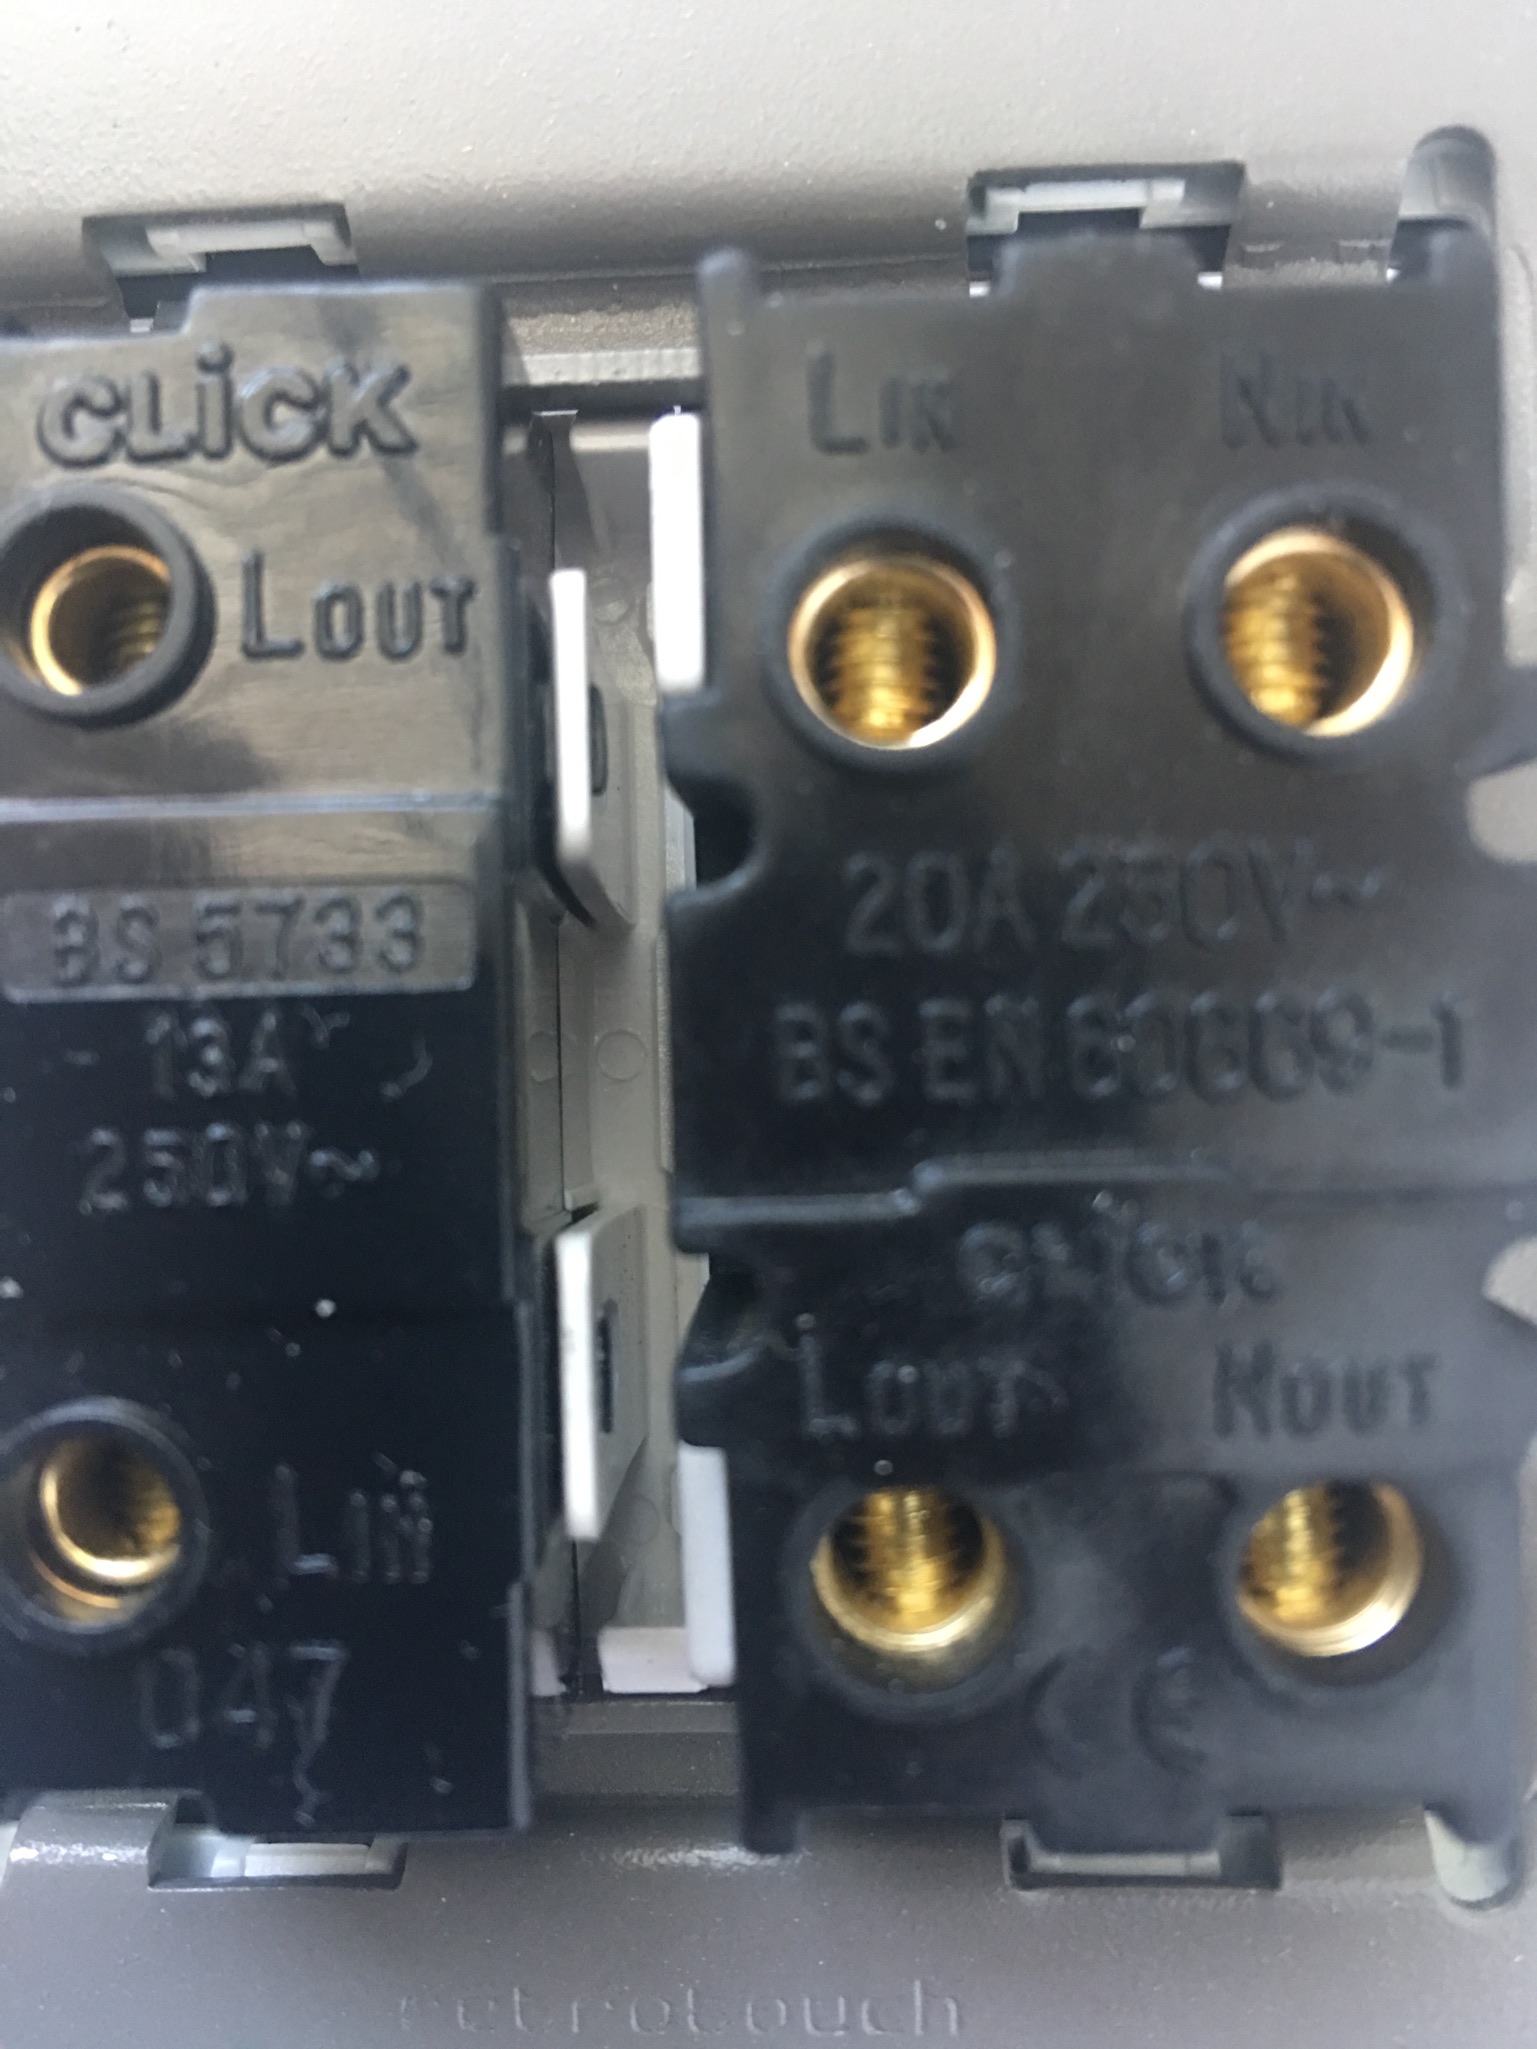
I’ve now connected 14 Fibaro Dimmer 2s with no issue. Then suddenly tried to connect my 15th, and it stuck on synch pending.

I then stumbled upon your advice to other readers as follows:

‘ To get the Fibaros connected as ‘Zwave secure’ (required for @zcapr17’s DTH) they need to be within a few meters of the hub during inclusion.

Bring the hub over to the Fibaro using a long Ethernet cable, do the inclusion, move the hub back to the usual position and then do a Zwave repair via ST settings.‘

and…

‘Zwave secure inclusion will be achieved by default so long as you include the (secure compatible) device in direct range of the hub (I.e. no hops in the mesh).

If you are further out from the hub, the inclusion messages will need to be passed through other devices which cannot pass on the ‘secure’ setup codes, or whatever the terminology may be.

Once secure inclusion has been achieved, you can move the device further out and day-to-day secure events can be passed through the mesh no problem.’

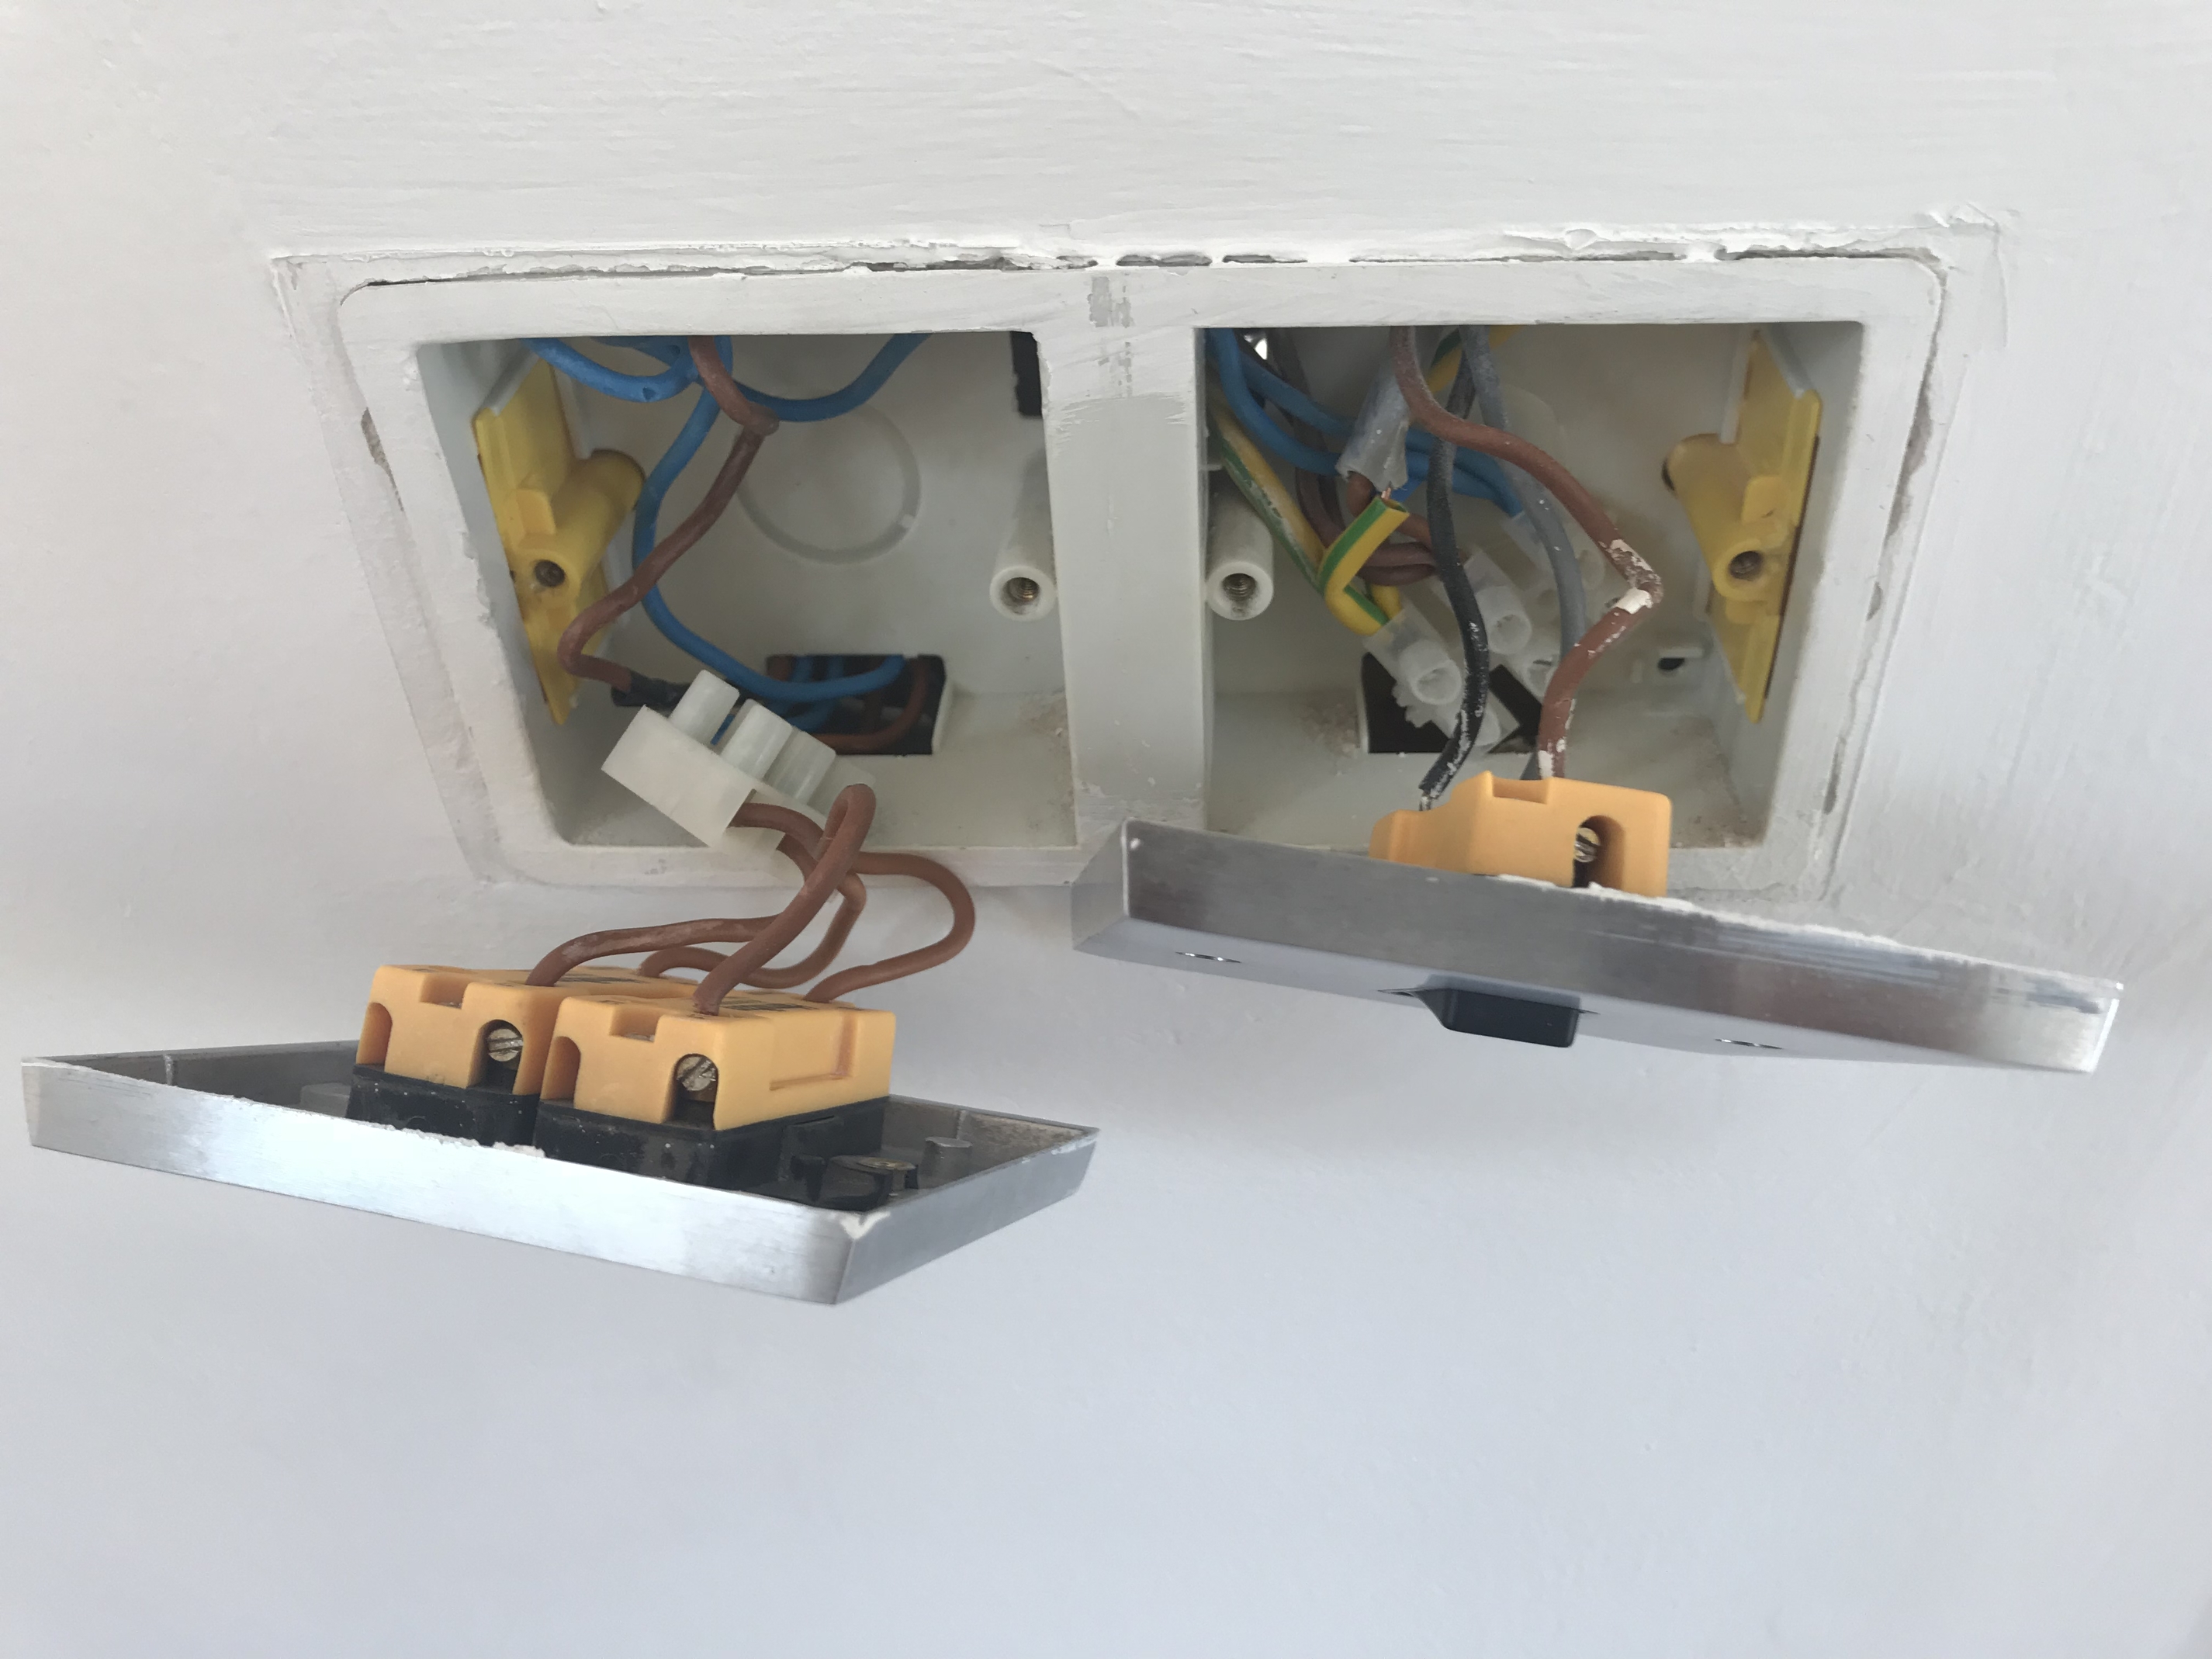
I do clearly now see a non-secure error message when I try to include. My problem is that even when I take the Hub close to the Dimmer, it still appears to contact the hub via the Fibaro Dimmer next to it.

I will try work with the electrician to get a place which is close to the SmartThings Hub and away from other Dimmers, but am I the only one who thinks this is a major flaw and that there should be a neater solution? Many, many people will set up multiple Fibaros like me, that are placed next to each other. Having to find a place to wire them first, without meshing via another Fibaro is quite a hassle!

I guess this is more a grumble than a question. Unless there are additional things to try that are a little easier? Will report back with my attempts at solving the problem…

Will do. Thanks. Will report back!

Any downsides to doing this?