Hi all,
Just wanted to share some results on a project suggested by my wife. A couple weeks ago, I asked her if there was anything she wanted our home to do. Her idea was to have our Ikea shoe cabinet ( http://www.ikea.com/us/en/catalog/products/40216908/ ) announce the forecast in the mornings. We talked about it further and fleshed out the idea – basically ST needed to know when the shoe cabinet was opened and then tell our nearby kitchen Sonos to announce the day’s forecast. Fortunately, the built-in Sonos weather app already has criteria to restrict the functionality to mornings, but there was still the question on how to connect our cabinet to ST.
The obvious option would be an open/close sensor on each cabinet door. That way if she reaches for shoes (top shelf) or boots (bottom shelf) she’ll still get the forecast. However, it seems silly to me to use two sensors for this particular project. Likewise, a pair of multi-sensors with their orientation-sensing-abilities will get the job done, but again it feels like overkill. My alternative idea was to re-purpose a single moisture sensor for the task.
Basically, moisture sensors are little boxes with two terminals on the bottom. When electrical contact is made between the terminals, it sends a signal to the hub that an event has been detected. For the intended application of moisture sensing, water makes the electrical contact. For the shoe cabinet, I just needed to run some wires between the cabinet doors and and frame so that any open door creates an electrical loop between the moisture sensor’s terminals. The key advantage of a moisture sensor for this application is that I only need one sensor for the job and can connect it to as many doors as I choose to wire-up.
Here’s a photo diary of the project and a few comments along the way…
- First things first, here’s the shoe cabinet in our front hallway:

- When I pulled off the doors, this is the remaining frame…

- The cabinet doors rotate on a pivot (white oval-shaped thingies visible in pic 2 above) and are guided by these knobs, which slot into rails attached to the cabinet drawers. The plan is to attach one terminal of the Moisture sensor to each drawer’s knob, and the other terminal to the drawer’s rail. That way, when any of the drawers are in the ‘open’ position, electrical contact is made between the rail and the knob, completing the circuit.

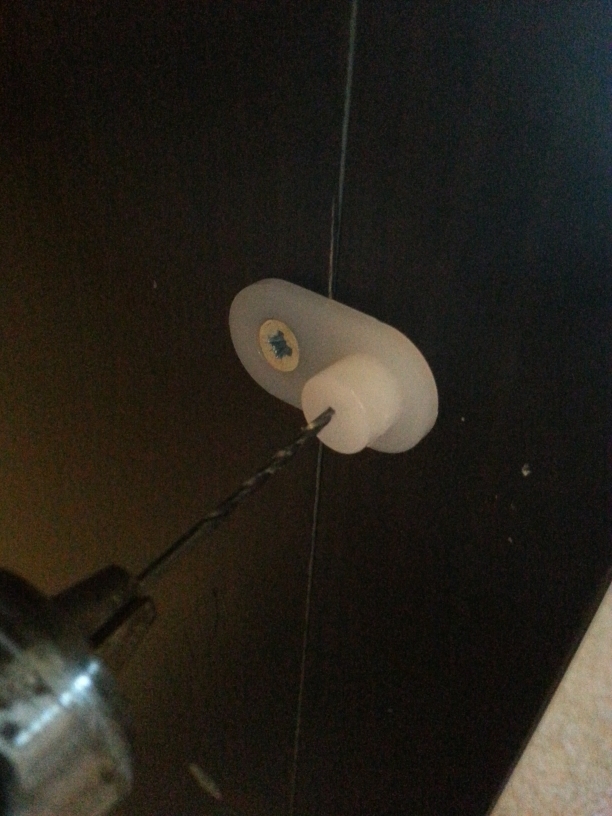
- To run the wiring through the knobs, I used a power drill to place a couple holes…

- The other hole…
- When the wire was run through the holes and taped down, it looked like this…

- Another shot of the taped down wire…

- This picture shows one of the rails each knob inserts into. At this end of the rail, I used some double-sided tape and kitchen-grade aluminium foil to line the area and make a conductive surface.

- The rail is open to the inside of the drawer by a thin slot in the plastic. I used this slot to thread some more foil and connect to an electrical wire that runs back to the Moisture sensor’s second terminal. The whole thing is held together with electrical tape.

- Here’s a shot showing wires connecting each knob back to the moisture sensor. The lower drawer is installed and I was testing the contacts manually. Also, notice the super-liberal use of electrical tape to connect not-quite-long-enough wires to where they need to be.

- This shot is after all the wiring was installed…

- Drawer installed and shut…

- Drawer installed and opened… Some ugliness still visible, but it’s not too bad.

- Final shot of the Smart Shoe Cabinet open and (take my word for it) reporting the weather!

Hope you enjoyed reading about the project. Let me know if you have any other creative ways to re-purpose devices. I have two extra multi-sensors… Seems like a real waste to use them as just open/closed when they have those super-useful orientation sensors…
 I saw there was an app that had most of the functionality I wanted already written called “Dry the Wetspot” by Scottin Pollock, so I used that as a base and added: