About 11:30 on Thursday I got a call at work from my very awesome neighbour Joe asking if I wanted my garage door closed. It was open for several hours…not cool. This is the second time this has happened as the roll up door senses load and will reverse if it thinks something is amiss. Normally I wait and watch, but evidently I missed it reversing. Apparently this was on display for a few hours:

Because I have been adding lights and door automation using SmartThings, I figured it was time to tackle some automation and added security for the shop.
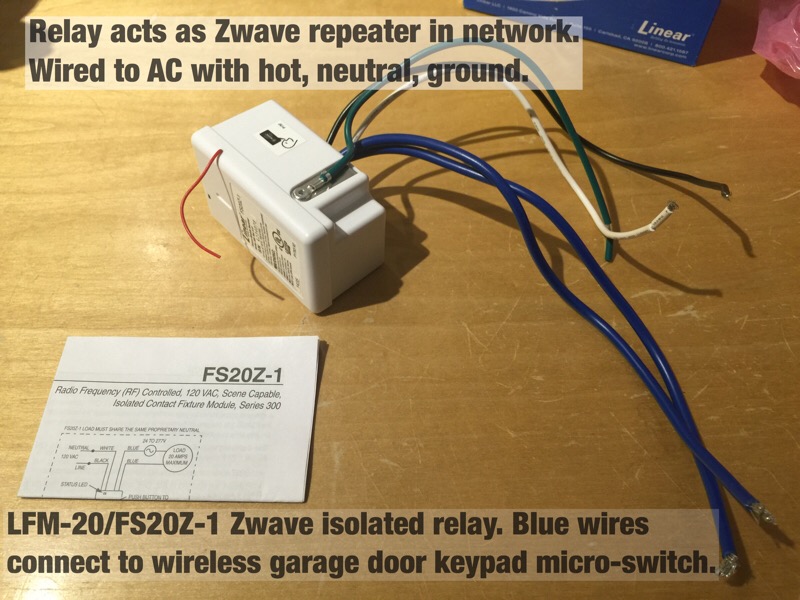
My roll up door came from www.smartgarage.ca with the GDO-8V3 direct drive opener from Automatic Technologies in Australia. This opener has no wired open/close switches, using wireless only. It detects load, and will reverse if it senses an obstruction. It also has a safety beam to stop the door. This means adding a relay switch to open and close the door is not so easy as there are no provided contacts on the motor drive unit. I was able to find a way around this without touching the drive motor or electronics.

This relay, commonly known as the LFM-20 is perfect for this job. You wire it like any 110 AC device (it draws about 1 watt). It’s also sold as the FS20Z-1 for $35 on Amazon. The blue wires provide an isolated relay which is simply on/off and can manage a wide range of loads and voltages. Once you install one, it functions as a node repeater for your Zwave network to increase range.
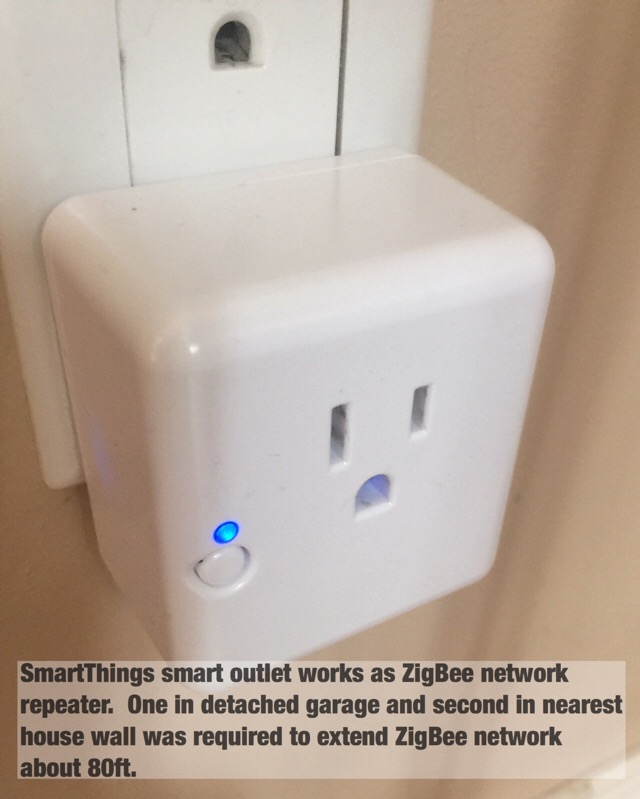
Because I’m using ZigBee SmartThings motion and contact sensors, I needed to add one of these SmartThings outlets into the shop, and another inside our kitchen to extend the ZigBee network 80 ft or so to the detached garage. Zigbee and Zwave use different radios and technology but are similar in that both form a mesh network. Battery operated sensors don’t typically work as network repeaters as that would kill battery life. This is why you may need powered Zwave or Zigbee devices to extend a network.
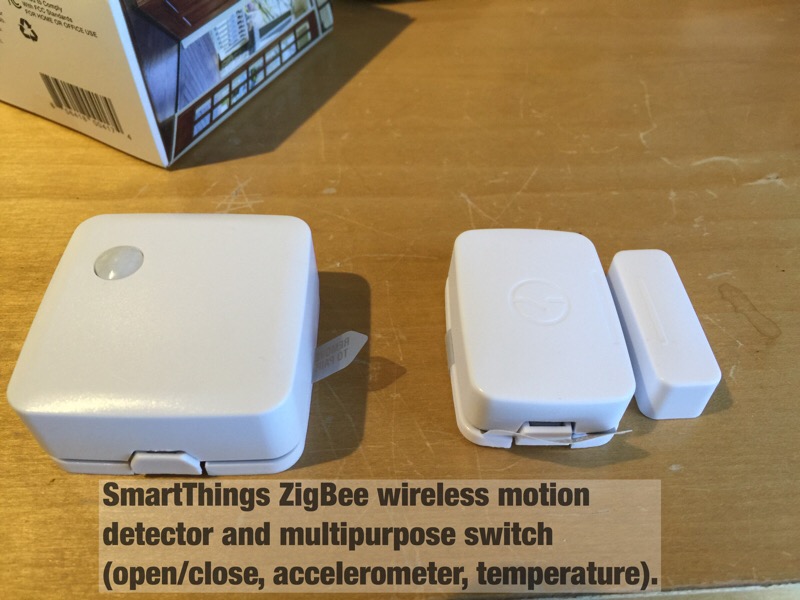
These SmartThings sensors are quite nice. The motion sensor responds very quickly, and also reports temperature. The multipurpose sensor on the right works like a contact switch, but also reports temperature. The multipurpose sensor also hosts an onboard accelerometer which reports both motion and position making it quite handy. With a conventional garage door, you can mount this sensor directly to your door and configure it to report the door position. Door closed, the sensor would be vertical, and open, the sensor would be horizontal. This is not so easy with a roll up door, so I’ve set it up a bit differently.
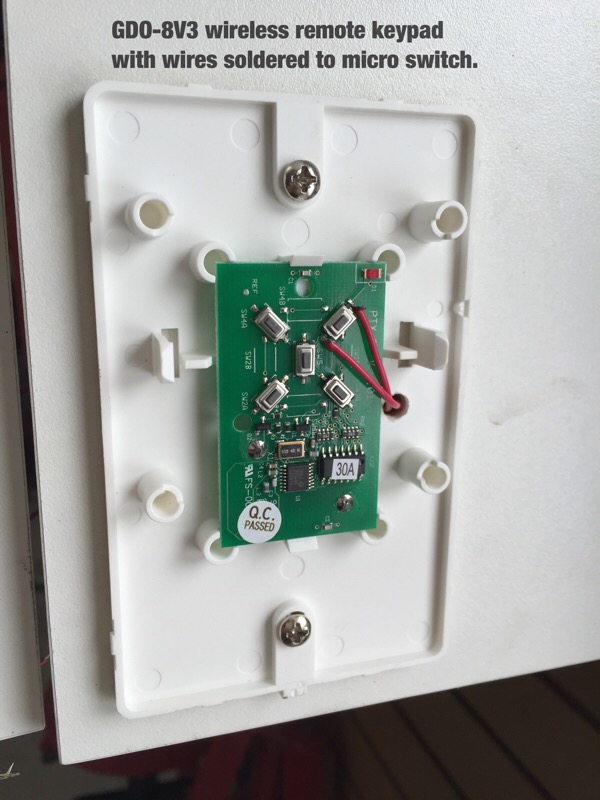
With no way to wire a relay into the motor, I took the wireless keypad apart and noted it used micro-switches. This controller is a bit different as there is no discrete up/down switch. Press once, the door goes up. Press again, it stops. Press again, it lowers. There are four buttons there in case you have multiple doors (up to four) to control.
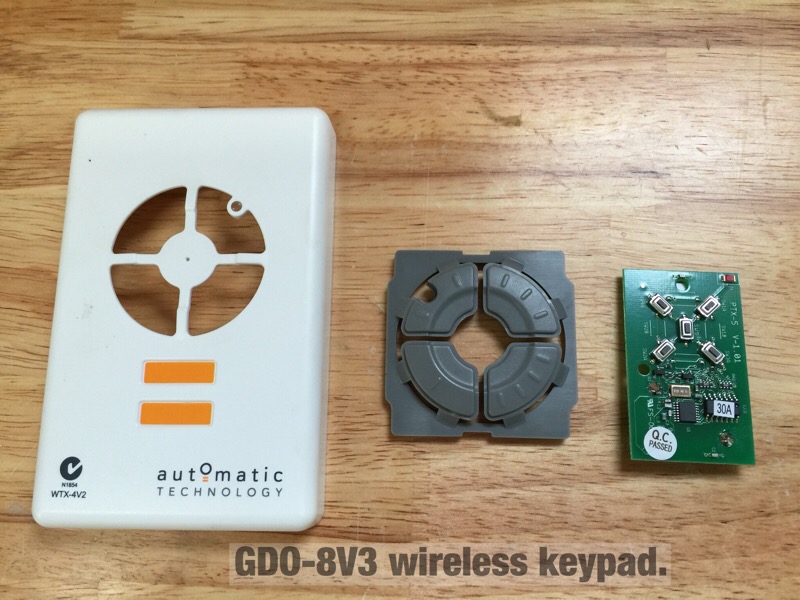
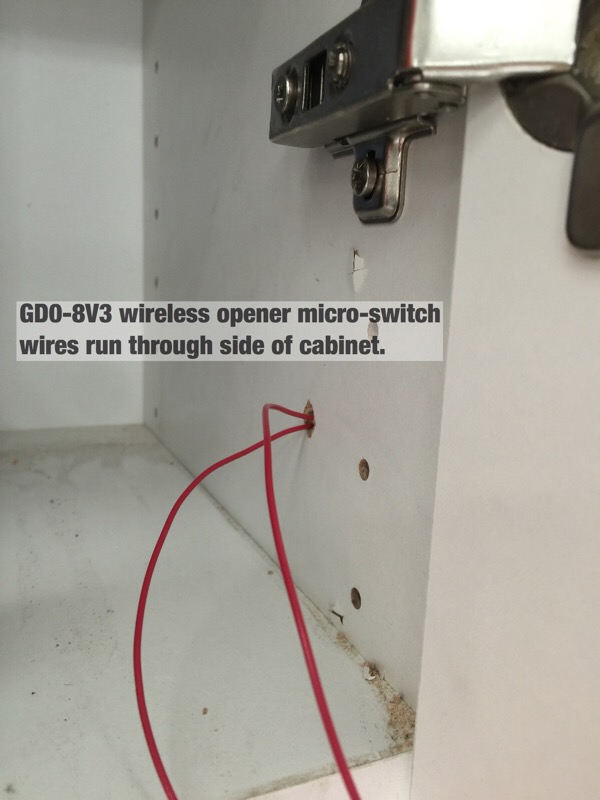
I carefully soldered on some light gauge wires and mounted the keypad back in position. A hole drilled into the mounting plate allows the wire to pass through the cabinet hosting the switch. Touching the wires together is essentially the same as pressing a button on the keypad. The LFM-20 relay will do this for us.
Inside the cabinet. These red wires connect to the LFM-20 blue wires.
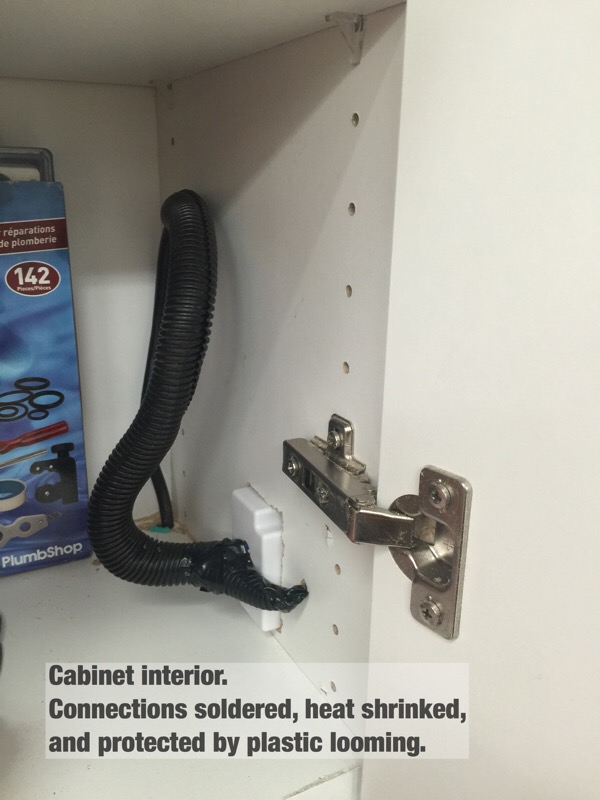
Power comes to the LFM-20 from an extension cord running from a GFCI outlet. The connections are soldered, heat shrinked, and protected by looming.
After cutting a hole for the LFM-20, the end result is nice and clean.

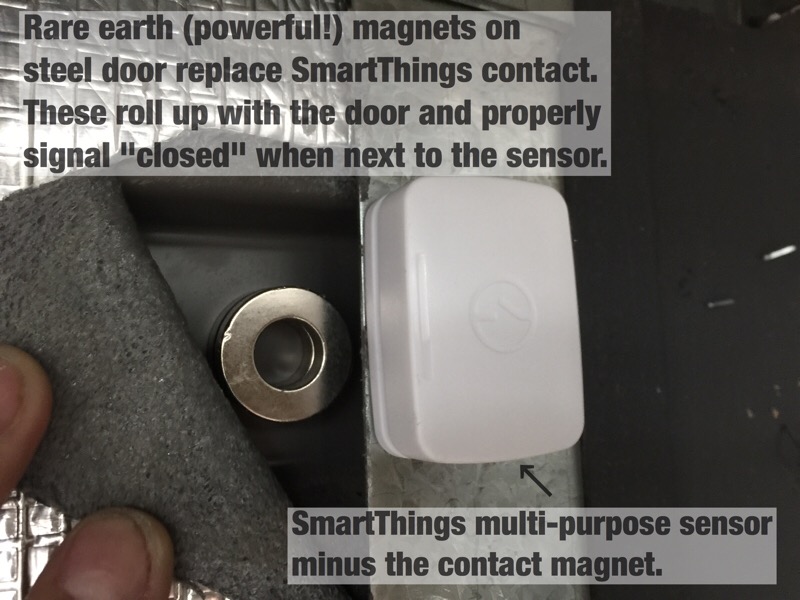
The other important component is a sensor to indicate if the door is open or closed. This is where the SmartThings multipurpose sensor comes in handy. It also reports temperature, so can drive alerts if desired for low or high temps.
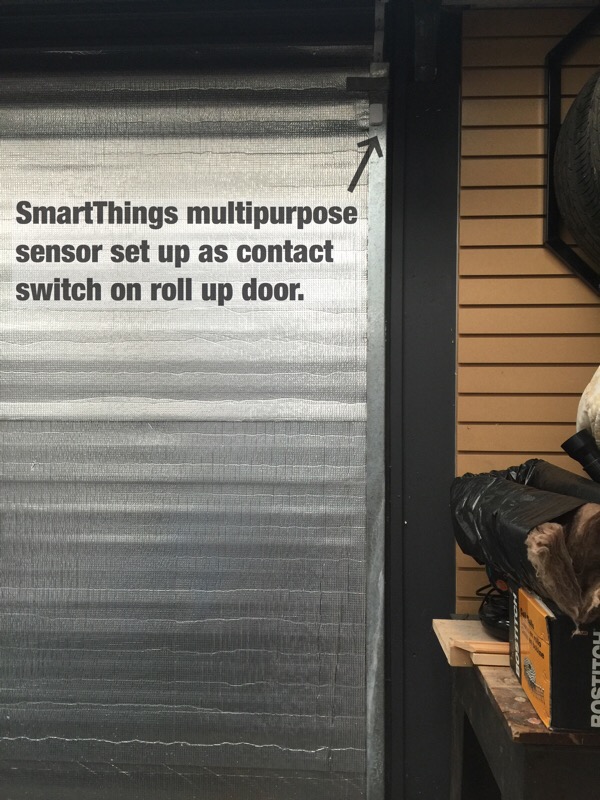
The ST sensor has two components when used as a contact switch. The smaller 2nd bit is just a magnet, that normally needs to line up with the sensor quite closely to indicate open/close. In this case, I’m getting the same effect (note that the magnets sit below the sensor) by using some powerful ring magnets, stuck to the door. They sit nestled in a door corrugation, so can roll up with the door and clear the door stop right above them.
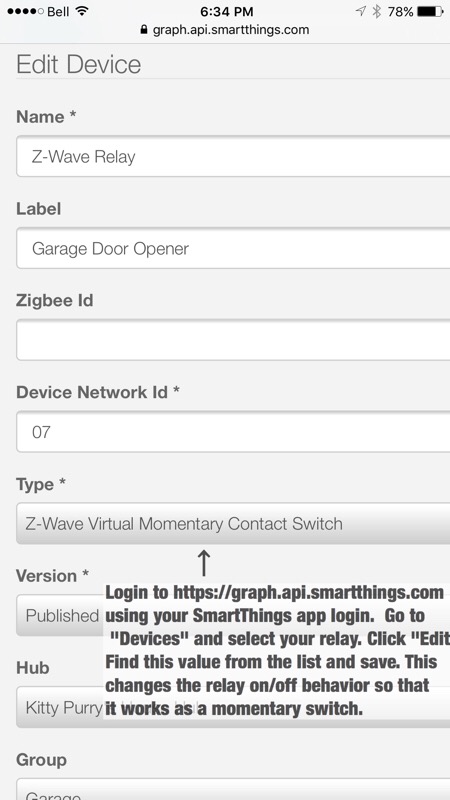
Once you include the relay and sensors into your network, there is one step left to change the behaviour of the LFM-20 relay from on/off to a momentary switch. The SmartThings app is used to manage your network and automations from a smartphone, however to get under the hood like this, you log into their developer web site using your SmartThings app login. This lets you customize code, devices etc. You can also publish third part automation “apps” to yourself, which then show up on your smartphone.
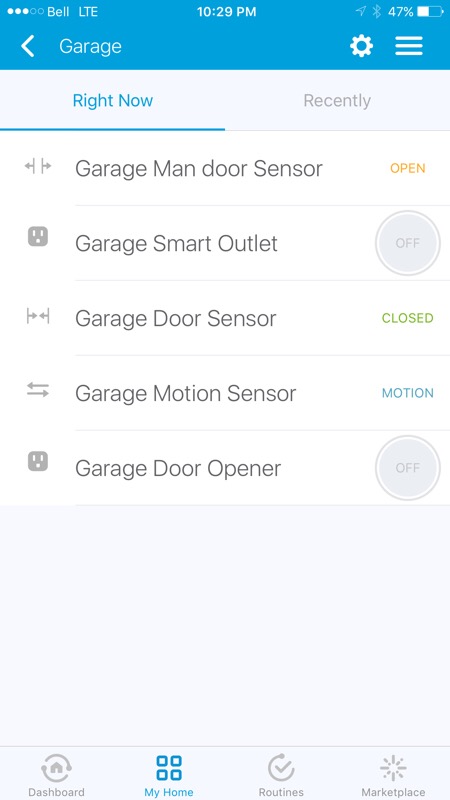
Now, you can see the shop is all set with a few sensors. Touching the “Garage Door Opener” button sends a command to the door relay which will open or close the door anywhere you have a data connection for your phone.
 It can be a bit confusing reading online as many posts relate to ST v1.