SmartThings Swimming Pool Solar Heat Automation - DIY

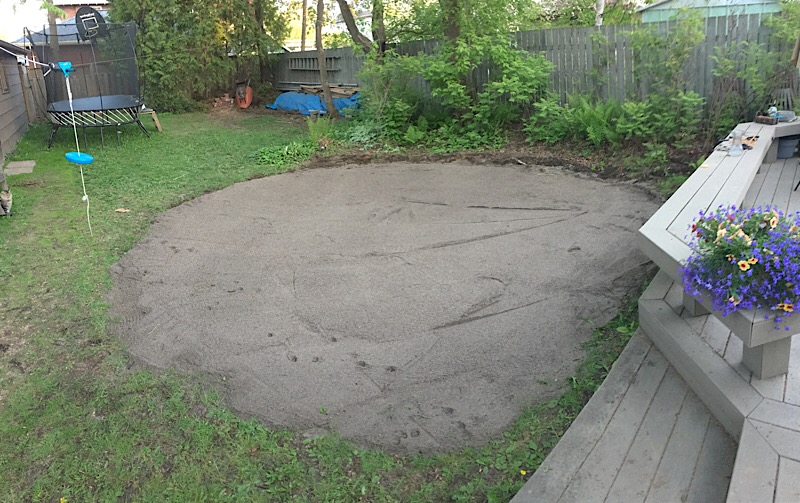
My youngest has been bugging us for a pool. Not wanting to endure the time/expense/pain of an in-ground, this bag of water will do for a few years until the kids split. A few days of digging to level a 20ft circle and hauling three yards of masonry sand, and we were good to go.

I managed to get this level to within about a 1/4" or so, apparently important in keeping a bag of water happy…

Once the day or two of prep was done, setting things up was simple. It turns out salt water is not so hard to manage…but the solar heaters and plumbing ended up likely costing more than the pool/filter/chlorinator combination.

First of all, if you buy a pool kit like this, it will come with hoses terminated with 40mm metric threads (all hose ends are female) to connect the pump and sand filter together. I added a salt walter chlorinator (again, from Intex) which uses the same hoses. If you’re planning on adding in solar, you’ll want to purchase the hose adapters below, and a few extra 40mm hoses as well. Both can be found on Amazon. The hose adapters take the 40mm female hose end to a male 1 1/2" thread so you can use standard ABS or PVC fittings to plumb in your solar. Intex 1 1/2" hose actually uses a 40mm thread…so you’ll need the adapters.

You can mickey mouse your own fittings, but keep in mind that a 7000 gallon pool makes a pretty big mess if a fitting fails! I played with a few iterations and just ended up using these adaptors from GAME. My brother has a similar setup and tried cheap Intex solar mats. Not only did they fail, but his pool was drained twice because of this!

You can see the adapter used in the following pics. Why do you see both ABS and PVC? I started using PVC and then realized that the less expensive ABS is more than adequate given the low pressures and temps at play here.

Btw, if you’re planning on adding a pool vacuum, this plumbing arrangement works great. The pool vacuum is the blue hose on the right, and standard water intake for the Intex pool on the left. If you leave the pool vacuum head in the pool, there is an added benefit as you can draw cooler water from the pool bottom. This increases solar efficiency…

As far as the solar, it starts here as I take the water output from the chlorinator via the Intex hose adapter to 1 1/2" PVC pipe. The bottom is the supply (cold water), where you see a check valve (spring removed, so flapper only) to prevent water draining from the panels from running through the sand filter backwards when the system is shut down. Warm water from the solar panels enters the pool via the standard Intex return hose on the top pipe.

In the closed position the valve you see forces all water through the solar heaters, and open, it essentially bypasses them.

As far as the solar water heaters, it makes zero sense to make your own when you can purchase 4x20 ft kits like this via Amazon for $167.
Btw, there are heaters out there like the GAME which are complete and utter wastes of money. To heat pools with solar you need square feet…from 50% to 100% of your pool surface area depending on how shaded the pool is. Our pool is pretty much 80% shaded, so 160 square ft of collectors is a bit undersized.

I’ve done something unconventional and draped these collectors (they are 20 ft long) over the peak of my kitchen roof…which is about 16ft away and 15ft up from the pool. I was thinking air entrapment would be an issue, however it’s not proven a problem.

This is the view of the panels on the intake side, looking down. I’ve made a manifold of sorts so that each side of the 2ft wide panels is now an intake, and far side (previous pic) are where the water exits the panels. The manufacturer has the panels set up so that water enters and exits the same end…with the far end blocked off. This forces a 40ft water path through each panel, which proved far too restrictive for my setup. I’ve plumbed these basically in a parallel configuration which is what the pros recommend. Having tried both, I’d agree. Flow was terrible when set up as per the manufacturers recommendations. Keep in my mind that I’m using the standard 1600 gph Intex pump that came with the pool I did not want to up a separate solar circuit and motor. Thankfully, the Intex pump has enough head to run water through these panels, once they they were plumbed as a paralel non-cross flow config. (I tried several configurations!)

This is the view just below the kitchen roof where supply and return are plumbed. The black/green bit in the middle of supply is a combination vacuum relief/bleeder valve.

You might think that this valve should go at the highest point of the solar array, however this did not work. Suction (from return water) kept pulling the floating ball contained in this fitting downward off its top seal, allow air into the system while the pump was running. Putting it on the supply side worked far better as the pump pressure now keeps the internal sealing ball properly pushed up against it’s top seal. When the pump turns off, the internal check ball drops down and allows air into the system, ensuring all water in the panels can drain back to the pool. This prevents suction in the system from collapsing the panels. A vaccum relief valve is another “feature” that you would (or should!) find in any professionally installed system. With a more powerful pump I likely could have moved this relief/bleed valve higher in the system so it would serve as a high side bleed as well as vacuum relief.

I should mention that I tried a few configurations, and this one works best. Why? Flow to the pool (again using the standard 1600 gph Intex pool pump) is very good…almost as good with solar as without. Also, temperature gain is about 4-5 degrees F on a sunny day, which indicates high efficiency. The goal with solar pool heating is very high flow, and a low temperature differential. This in turn maximises BTU gain to the pool. On one of the early days of use, I calculated about 460 000 BTU gain in one day. This is calculated taking (gallons X temp gain in F X 8.33). Our back yard is completely shaded virtually all day, so solar gain is pretty much via the solar panels only.

Automating the pool pump via SmartThings turned out to be an interesting project. The first thing I had to do is replace the GFCI plug end for the pool pump as cutting power to it requires a manual reset. Not good for automation. The entire system is plugged into a GFCI, so removing the plug end was not a safety issue in this case.

I’m using a GE outdoor power dongle that is controlled by zwave, so therefore ties into the SmartThings hub and automation. I use these units for my outdoor lighting and winter block heaters (for the cars) … they are very reliable.

Both pool pump/filter system and salt water chlorinator run off the zwave plug above. The chlorinator has it’s own digital timer that you can set. When powered on, it just runs for 3hrs (this time works well for this pool, based on water testing for free chlorine), so this device didn’t need any further automation.

To automate things I just needed to be able to measure the roof temps, vs water temps. These SmartThings door/window sensors have a built in temperature chip, so work as relatively inexpensive wireless sensors. They use the Zigbee protocol, so require a powered Zigbee device (like a smart plug) reasonably close (15-20 feet) to ensure good signal relay back to the hub. I had one of these floating in a weighted ABS (sealed) pipe but kept losing signal depending on where in the pool it was floating. More on that later. Right now, these SmartThings sensors work well sitting in a small Tupperware container on the roof, and directly in contact with the return/supply pipes, just sitting on plastic zip lock bags, and wrapped in foam to insulate them from outside temps. These sensors all require “calibration” which means checking the temps with something reliable, and entering an offset in SmartThings ( plus or minus) so the sensor is showing the correct temperature.

I found reference to the 1st generation Fibaro door/window sensor (zwave) that has a connection block to allow use of an external temperature probe (DSB1820). The 2nd gen version Fibaro door sensor does not have an external temp probe, however their Universal Binary Sensor does :slight_smile: This works very well indeed…and is much more accurate than the SmartThings sensor. No calibration required in this case. I’ve wired in 3 rechargeable AA cells (3.6 volts) to replace the small lithium cell that the sensor uses. The battery carrier was removed from a cheap LED flashlight, and sits with the sensor in the ABS tube (pic below) attached to the pool frame.

This is the wiring used with the external temperature sensor.

The DS18B20 waterproof external sensor is pretty inexpensive on amazon at $4.

This was my floating sensor housing, now re-purposed as a water proof housing for the Fibaro sensor. It returns temps in Fahrenheit to 1 decimal point accuracy. The probe just hangs over the side of the pool sitting 6-8" in the water.

In the SmartThings app, this is what the pool sensors look like on a sunny day:

I added a SmartThings “virtual switch” (you need to do this in the web IDE) so I could turn the pump on and have it ignore the automation code that turns the pump on and off. The code I wrote using WebCore in SmartThings turns off the solar logic if this virtual switch is “on”. WebCore is an app you can add to SmartThings that allows you to write pretty complex automation code in any web browser…freeing you from the iOS app. My little apps (called Pistons on the webcore world) are very simple.

This one turns the pool pump on if the roof temps exceed water temps by six degrees F., and turn it off if temps are less.

This bit of code sends a notification to our iOS devices if the pool pump is turned on or off:

Finally, this bit of code turns the pump on or off and pauses/resumes the solar control app if one turns the pump virtual switch on or off. This way the pool pump can be run regardless of the water/roof temps.

This system has been running pretty much unattended for six weeks now, so a success in my book :slight_smile:

7 Likes

Here’s a few graphs from a warm day last week:

I took a few minutes to measure actual flow (with a 2 gallon bucket) with the sand filter and solar array active. Flow is lower than I had guessed, at about 1028 GPH.

System performance specifications:

  1. Pool Pump - Intex SF80110-1 , 2 amps , 1600 GPH.
  2. Actual (measured) system flow with sand filter and solar array in use: 1028 GPH
  3. Max measured BTU (at about 3pm with full sun, 28C day) = 1028 x 8.33 x 6F = 51 379 BTU/hour
  4. System head (max lift height to peak of roof) : 17ft

A new season (2019) brings another heating season…and a few improvements.

The solar heat worked quite well last year, but two things became apparent by the end of the season:

  1. Because the pool is shaded, the suggestion of having the pool surface area equivalent in solar heaters became obvious. The 18 ft pool has a surface area of 240 sq/ft, so I added two more 2’x20’ panels this year. The total is now six, to equal 240 square feet.

  2. We have cool nights here due to lake effect. Tonight for example, we’re dipping down to 7C (45F) and I figured heat loss to the ground must be significant. The pool was losing 7-10F on cooler nights…about 583 000 BTU last year. This year I decided to try 2 inches of polystrene underneath. We’ll see how this goes.

Finally, with the two added solar collectors now on a higher portion of our house roof, the Intex pump could not lift the 17ft of so now needed. I measured power use of this pump at only 100 watts, or 1.4 amps. This is in the order of 1/4 HP, and less than the spec sheet of the Intex SF80110-1 pump. I have a 2 speed 1 HP pump coming in which should do the trick, and make pool vacuuming a lot faster too.

I had lots of help this year as the girls were anxious to get swimming!

Our tap water is very cold this time of year, in the order of 45F, so getting in the pool to addresss liner wrinkles during fill is torture. This combination of bits from HD allowed me to fill the pool via the solar system. With reduced flow, the 45F input water was exiting at about 70F, making it much nicer on the feet :slight_smile: The brass end is a female coupler for a garden hose, the other end is 1.5" pipe thread to attach to my PVC solar plumbing.

By my rough calculations the new pump and 50% increase in solar collector area should result in about 600 000 BTU on a good day…a solid 10F increase. The science project continues.

The SmartThings automation using WebCore required no changes…it worked like a champ all summer :slight_smile:

1 Like

Interesting build. Looks like what I just did :slight_smile:
I built a 6 * 4 enclosed solar heater with 200" of black poly and put on the roof of my shed.
Plumbed it through a variable speed recirc pump and a T adapter into the filter output. I put a temp prob in the pool attached to a Fibaro FGK-101. WebCored to cycle filter and run recirc pump when the ambient is above 15 C and the pool is <=29.
Might add another panel pointing 45 degrees south to grab more of the morning and early afternoon sun as we do get cool nights sometimes.
PS I have 1" insulation under the pool and it’s good for ground insulation and better on the pool bottom (and feet).

Daven, very similar indeed :slight_smile: It was a very cold 39 F here last night, but the pool only dropped from 62 to 60 F. That’s pretty good for a 23 degree difference from ambient. It also is a lot less heat loss than I observed last year with the pool just on sand. I was expecting to see 6-9 F loss. For those in colder climates, the pool on 2" of styro definitely makes sense.

Thanks to: Release: Data storage, Energy/Temp/Humidity Graphs and energy optimization back to you

The pool sensor data can be viewed publicly. You can see live as well as historic data for four sensors… roof temp, solar output temp, and pool surface/bottom temps. Click the pic for live data:


The new pump should be here tomorrow to get those two new panels online. The pool water was at 49 F three days ago…and we’ve seen night temps from 39-45 F with day temps (mixed clouds with some rain) at a max of about 68 F. Regardless, the 7000 gallon pool has picked up about 15 F despite night losses.

That’s some slick graphing. Is this WebCore driven with your reference link?
If it is I would love to see the piston for a primer.
Cheers

I’m only using WebCore to automate the pool pump.

Ipstas did all the brainwork here: Release: Data storage, Energy/Temp/Humidity Graphs and energy optimization back to you

Set up a free account at w https://www.hundredgraphs.com

Once your account is set up you can obtain an API key from hundredgraphs.

Install Ipstas ST app linked above and use it to choose sensors and properties that you’d like to feed hundredgraphs. Once that is done, and the API is entered into the app, you can go back to hundredgraphs and have graphs running in a few minutes using the feeds that you’re piping to the website :slight_smile: I’ve set mine to public so other’s can check in on our heating efficiency.

Aartech.ca still has some older FGK-10x sensors in stock, so I ordered three more to more accurately control and monitor the system. The older firmware FGK-10x (pre 2.5 firmware) actually reports temps more consistently. The newer ZW5 has a reporting “bug” that causes the temps to bounce around a bit. Go figure.

For these ver. 2.05 sensors, you must use JJ’s device handler…the ST default will not work:

I wanted to sort a solar charged wireless “data” station which will soon incorporate DS18B20 sensors mounted into drywells mounted directly into the return/supply solar pipes. I’m using 3 low discharge NiMH cells charged with a small solar cell. They deliver 4 volts or so, which the sensors seem fine with. It’s mounted with few bits of composite deck and an adjustable mount for the solar cell.

The three fibaro FGK-10x sensors and 3 AA cells are shielded from water using a standard outdoor electrical box. The lithium cells in the sensor are removed, and + - leads soldered to the battery connectors inside each FGK-10x.

Temporary mount until the drywell bits arrive:

We’re hitting 78-82F in the mostly shaded pool with six collectors on the roof.

Hey, nice pool and thanks for using HundredGraphs, it is great you found it useful

1 Like

IP, Hundredgraphs is the easiest graphing interface for SmartThings I’ve seen yet. Insights gained by being able to visualize a few weeks of data have ramped me up a bit to the point of adding a few more temp sensors, and integrating a variable speed pump. This way I’ll be able to monitor delta temps (input vs output) and vary pump speed for max solar efficiency. cool stuff.

1 Like

The easiest interface is just like an additional sugar in my coffee (I take 8, but don’t stir), huh. Thanks, that was exactly we were trying to achieve.

I hope you will find the future improvements useful as well, we are going to introduce the customized energy dashboard in a couple of weeks to make it even easier to understand where the energy goes and for what.

1 Like

That will be great. One of my motivations for automation in general is efficiency. We cut our family consumption by 40%, and 15% at my commercial building (which was already hyper-efficient). The only really effective tools I had during this process were a watt meter and the hourly consumption graphs provided by our utility. I’ll be very interested in seeing what you come up with :slight_smile:

Ok, so serious geek warning ahead…but I love this stuff :slight_smile:

I was looking for a more accurate way to get fluid temps with a solution that protects the probes, does not cause a leak hazard, and is easily removable. Enter a solution from the world of beer brewing (and likely every lab worldwide…ha), the thermal well. The pics are self explanatory.

The very inexpensive (but quite accurate) DS18B20 waterproof external temperature probes I’m using are available all over amazon etc. They have a diameter of 6mm. It turns out that these thermal wells are designed for them :slight_smile: I was unaware that a “thermal well” was a thing a week ago, so was very interested in checking them out.

I used a 1 1/2" ABS T, and a 1 1/2" bushing with 1/2" thread to plumb in the thermal well:

The thermal well ships with an insert, seal and top nut for a watertight installation:

Here it is installed:

Water temps ranging from 78 to 82 make for some successful backyard parties!

Here’s the updated dashboard with “live” BTU calculations. Serious geek stuff here (click to visit the page). To calculate live BTU output I created a simulated temperature sensor in SmartThings, but feed it a value (using WebCore) calculated using the difference between input, output, and the measured output (GPH) of the system on solar. This in turn is spit out to hundredgraphs to display BTU output “live”:


2 Likes

Just in case someone down the line is looking to recreate the live BTU calculation, here’s the code:

This line:

Calculates the BTUs based on a few factors:

  1. The difference between Input and Output temps (F).
  2. The measured GPH of the pump with solar system working ( 1512 GPH)
  3. Assuming one US gallon of my pool water weighs 8.32 pounds.

BTUCALC is a SmartThings simulated temperature sensor which I’m setting, using the WebCORE code, to the BTU calculation value. This way I can send this “sensor” information to Hundredgraphs for graphing and display.

Every time the roof temp, pool water temp, input or output temps change, the BTU output of the system is recalculated. Thanks to hundredgraphs, we can then nicely display and graph this information.

On just the first day, it was apparent that the best times for heat were not at noon as you might expect, but from 3 to 4 pm. Likely this is due to my roof configuration but again, a surprising observation based on just one day of data:

16:06:35 BTUCALC 87010
16:01:51 BTUCALC 78182
15:53:17 BTUCALC 73138
15:49:00 BTUCALC 81966
15:44:40 BTUCALC 98359
15:42:06 BTUCALC 84488
15:40:18 BTUCALC 92054
85028.14286

For 30 minutes or so the solar output energy to the pool was equivalent to our home furnace burning natural gas full tilt for 1 hr and 20 minutes!

For future reference, here’s the data on two pool pump plumbed in series:

Here’s the 2020 update on the system:

  1. I added 2 more 2’x20’ solar collectors for a total of 320 sq/ft. That’s about 80 square feet more than the pool surface area. Why? We’re close to Lake Superior so our yard can be 10 degrees C cooler than 10 miles inland. Also the pool is shaded so does not get a lot of direct sun.

  2. All equipment is now plumbed into a small shed.

  3. I use the Intex pump (SF80110-1) in series with an inexpensive 2 speed pump (on low speed) which pumps 2 stories up and gets us about 1500 GPH at the pool outlet on solar heat. The combination uses about 5.4 amps.

  4. My little solar/rechargeable battery hack worked 100% all the way through winter so I did not replace any expensive lithium cells on the wireless temperature sensors. This “hack” uses three AA rechargeable cells connected to a cheap amazon solar panel (5.0V). The three fibaro door sensors (each with a DS18B20 digital temp sensor wired in) have the lithium cells removed and are directly wired to the AA battery back. These sensors change temps often, so will churn through the expensive lithium cells in 1-2 months. The sensors have not required any power, even idling through the winter at -35C low temps!. The sensors reported low battery at 1% all winter, but stayed running, and continue to run off their solar/cell system. Smarthings is definitely not showing the correct “charge” as the sensor array has been live now for about 18 months on 3 AA rechargeables :slight_smile:

BTU output of the system will peak now at about 115 000 BTU with the 8 collectors.

June 17th, we saw an 8.6 F degree rise in the pool water (7000 gallons) to about 74 F. This means the system generated 501 466 BTU over the day…not bad considering the max air temp at the pool was 77 F at around 3:30pm.

This is a snapshot of the data on June 18th, at 2:43pm, a day or two after filling the pool. City water here is cold, about 49F coming out the the tap to fill the pool.

You can see air temps at the pool are not great, but the system is pumping out heat. Overall for the months of June, July and August, the pool temps averaged about 82 F, with a high of 86 F. For our climate and a shaded 7000 gallon pool, it looks like 8 collectors ( 320 square feet) is a good match. Temps last night dipped to 48 F (August 18) so heat loss at night is significant, however we’re still just at 82 F as I type this.

1 Like

Here’s some pictures from my build (previous post).
I was curious about the Amazon panels, there is no mention of heat stability.
If the water stops moving will the material they use stand up to 100 C water? I fear not.

This year I had to rebuild both my panels twice :frowning: due to an air leak/bubble creating a hot spot and a flow failure; the black poly melted with the stagnent hot water.
Had a power outage once but I was luck enough to be nearby and get a gen on the pumps!
I have tried to circumvent this with a Webcore piston that tracks ONLINE/OFFLINE and power but sadly when a device goes OFFLINE ST doesn’t update the status or set power to 0.

1 Like

Thanks for posting your system. You have a lot of time invested there :slight_smile: Have you ever measured flow and delta temps from the system? It would be great to have this data to compare! What are you using for a pump on the heat circuit? I see that you run it separate from the pool pump which is a good idea. I’m guessing that you need to prime your pool pump (as it is above the pool water level), or is prime addressed with the heating pump? My two pumps are below pool water level but if they suck air (from
the vacuum hose when in use) it is a minor PITA to get flow again.

The eight “Amazon” panels have seen zero issues since installation three years ago now. They have seen temps on the roof at about 120F (with sustained periods of pump off, particularly spring and fall when the pool is drained) and no issues. The plastic is a pretty stiff compound which has been fine with our harsh winters (as low as -30F) as well.

The poly pipe in your system likely is rated to 140F max, and you could see those temps easily on a hot day in the panel. I’ve seen quite a few days where the roof sensor hits 125F.

I introduced a leak into one panel with a careless placement of aluminum ladder (with no base padding) during the added 2 panel installs this summer. I was able to plastic weld this with a soldering gun set at about 600F.

I use a check valve on the solar panel input, but the vacuum breaker valve on the roof allows the panels to drain down to the pool when the system is off. This in turn prevents a strong vacuum and high heat from collapsing any of the panels. There is about 25 feet of drop In the system so the weight of that water can pull quite a bit of vacuum on the system.

Funny thing tonight as there is heavy cloud, zero direct sun to roof (8:30pm) and air temp
at the pool is 66 F, but the system is still “harvesting” heat from the warm roof. About 22000 BTU. There are definitely efficiencies gained using coils directly on your roof for this reason. I figure I should also throw a sensor in the attic and see how much solar pool heating effectively reduces attic temps on a hot day.

Year 4 and the system is working great :slight_smile: We set up the system last weekend and saw an increase from 50F to 84F in 3 days. That’s about 1 800 000 BTU, so lots of energy. I applied the same 5V solar cell setup to my rooftop Smartthings sensor (runs the system if roof temps exceed pool temps by 12F) so I won’t have to ladder up there for battery changes. 2AA rechargeable cells and the 5V solar panel power the sensor just fine. At this point all the sensors are solar powered and wireless so the system becomes more and more reliable as the tweaks are added :slight_smile:

As an update, I can confirm that a SmarthThings multipurpose sensor runs just fine off 2 x NiMH AA and a 5V solar cell on the roof. Temps up there reach about 130F. The roof sensor setup is pretty much the same as this (on my shop door), but the sensor is in a small tupperware container with the solar cell on top. The sensor reports about 60% battery with the 2 AA cells freshly charged, and has stayed that way on solar charging as well. That roof sensor is important as WebCore compares its temp to the water temp to decide when to run the pool pump. About 10F differential works well. Previously, the lithium cell would only run for a few months and then typically die with its last temp locked in. This in turn would cause the pump to run potentially overnight etc. It’s much better as a solar charged sensor.