I actually used learning resource buttons ( works with any easy button ) from amazon.
I put my Amazon Dash buttons ( How to use them here )
to control the colors of my RGB lights in my living room.
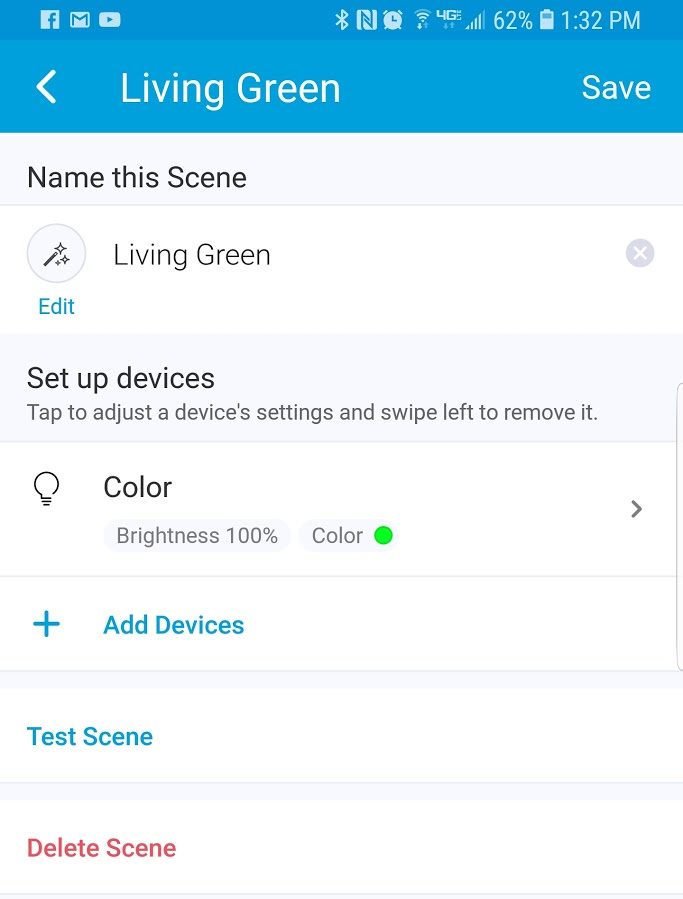
first I made “scenes” in smart things green,blue,purple etc…
The scenes looked like this.
After creating all of the colors I wanted I created Virtual Switches ( then made them momentary )
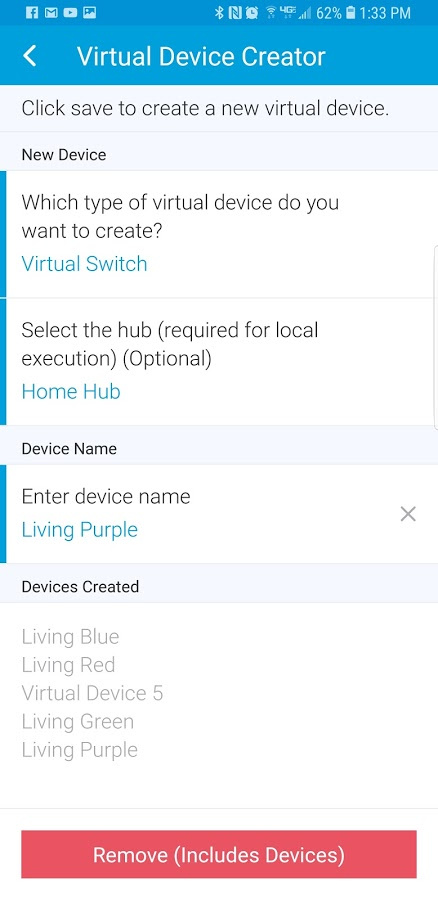
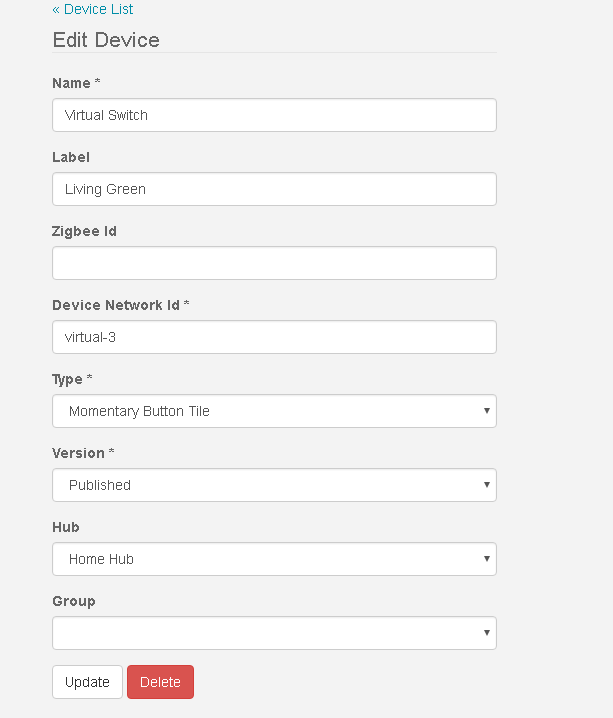
Now that I have a momentary virtual switch and a scene I need to link them so when I press “living green” it activates the living green scene.
Go into the Smart things Smart Lighting SmartApp and create a new smart lighting rule that looks like this.
https://photos.google.com/photo/AF1QipNRZb6uZeR7UrniaEpqagdHRVT80pKfJMkk1e20
Now go into the Amazon Dash SmartApp and make the Dash button control whichever virtual button you made.
Software side DONE! I press the dahs button it activates the “living green” virtual momentary button and that in turn activates the “living green scene” and turns my RGB LED strips to green.
Now for the hardware side.

4 screws and a battery door on the bottom ( under the foam feet )

The amazon Dash comes apart with a little prying using a flat head screw driver.

The Dash with no battery attached and the stock button, Now lets destroy the button to fit our dash inside.

Soldering the small wires to the momentary switch on the dash.
I ended up using the wires that come on the button since they were very thin gauge ( thinner than i had laying around ) be careful just touch it fast as it doesnt need much heat to attach and pre-tin the wire very lightly.
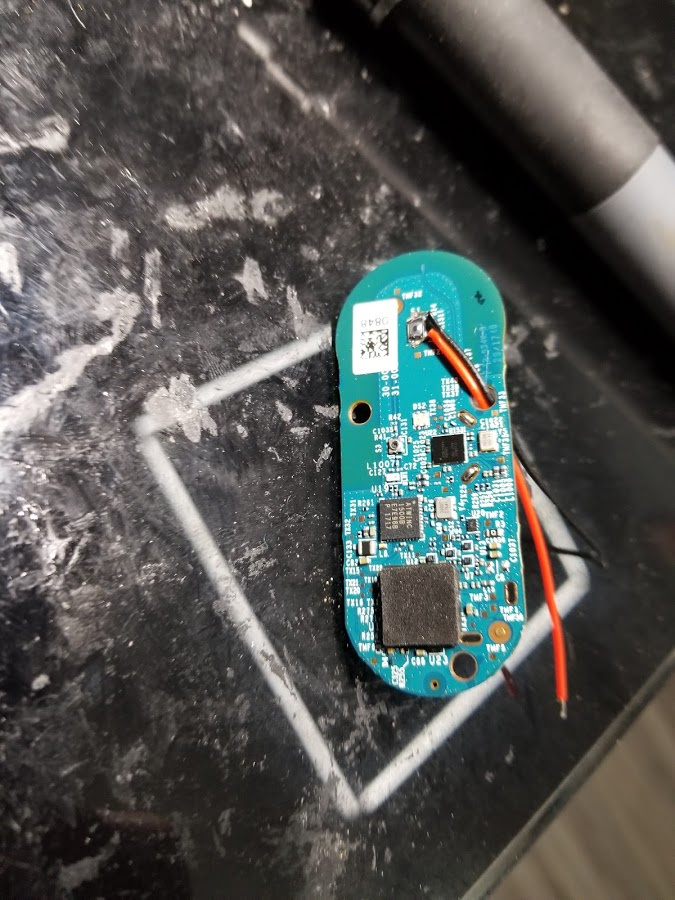
I hot glued the button after soldering the small wires to it so they don’t move.
I also hot glued the dash board inside.

Here is a more clear picture of soldering the power/battery wires. I only soldered it to use 1 battery in the middle to keep this button more balanced. 2K clicks per AAA per what amazon says.

This can be done with any kind of cheap “easy” button as they all use momentary switches.
For the button I could have just soldered to the button area itself but I used the solder points to the side of the button/board. I used a multi meter to tone through and see which points on the OEM board made contact when the switch was compressed then soldered to those points.
The kid likes using the big buttons to change the color and they look cool laying around the big table in the living room.
If you have kids and want to use a dash/easy button for the kids to be able to turn on their lights or pair it with a wall plug and let them turn on\off their nightlight from their bed etc…
Also side note with the DASH smart app you can have 1 dash button control a TON of devices all on/off at once. so these buttons could be used to turn every RGB light in/outside the house the same color at once.
Buttons - http://a.co/3zrs0GL
More colors - http://a.co/dqQF7ld