I don’t know exactly where you are, but I’ll try to explain how I did it
How to edit the LUA and yml code of the Edge drivers
I’m going to explain the steps I did, that I’m not a developer and I started from scratch, without knowing the CLI or Lua.
- First I read the Edge Drivers tutorials and CLI in the community
- Download a multilanguage code editor, I opted for Visual Studio since they recommended it in some thread of the tutorials.
Visual Studio: IDE y Editor de código para desarrolladores de software y Teams - Once installed, the Windows version in my case, this window appears
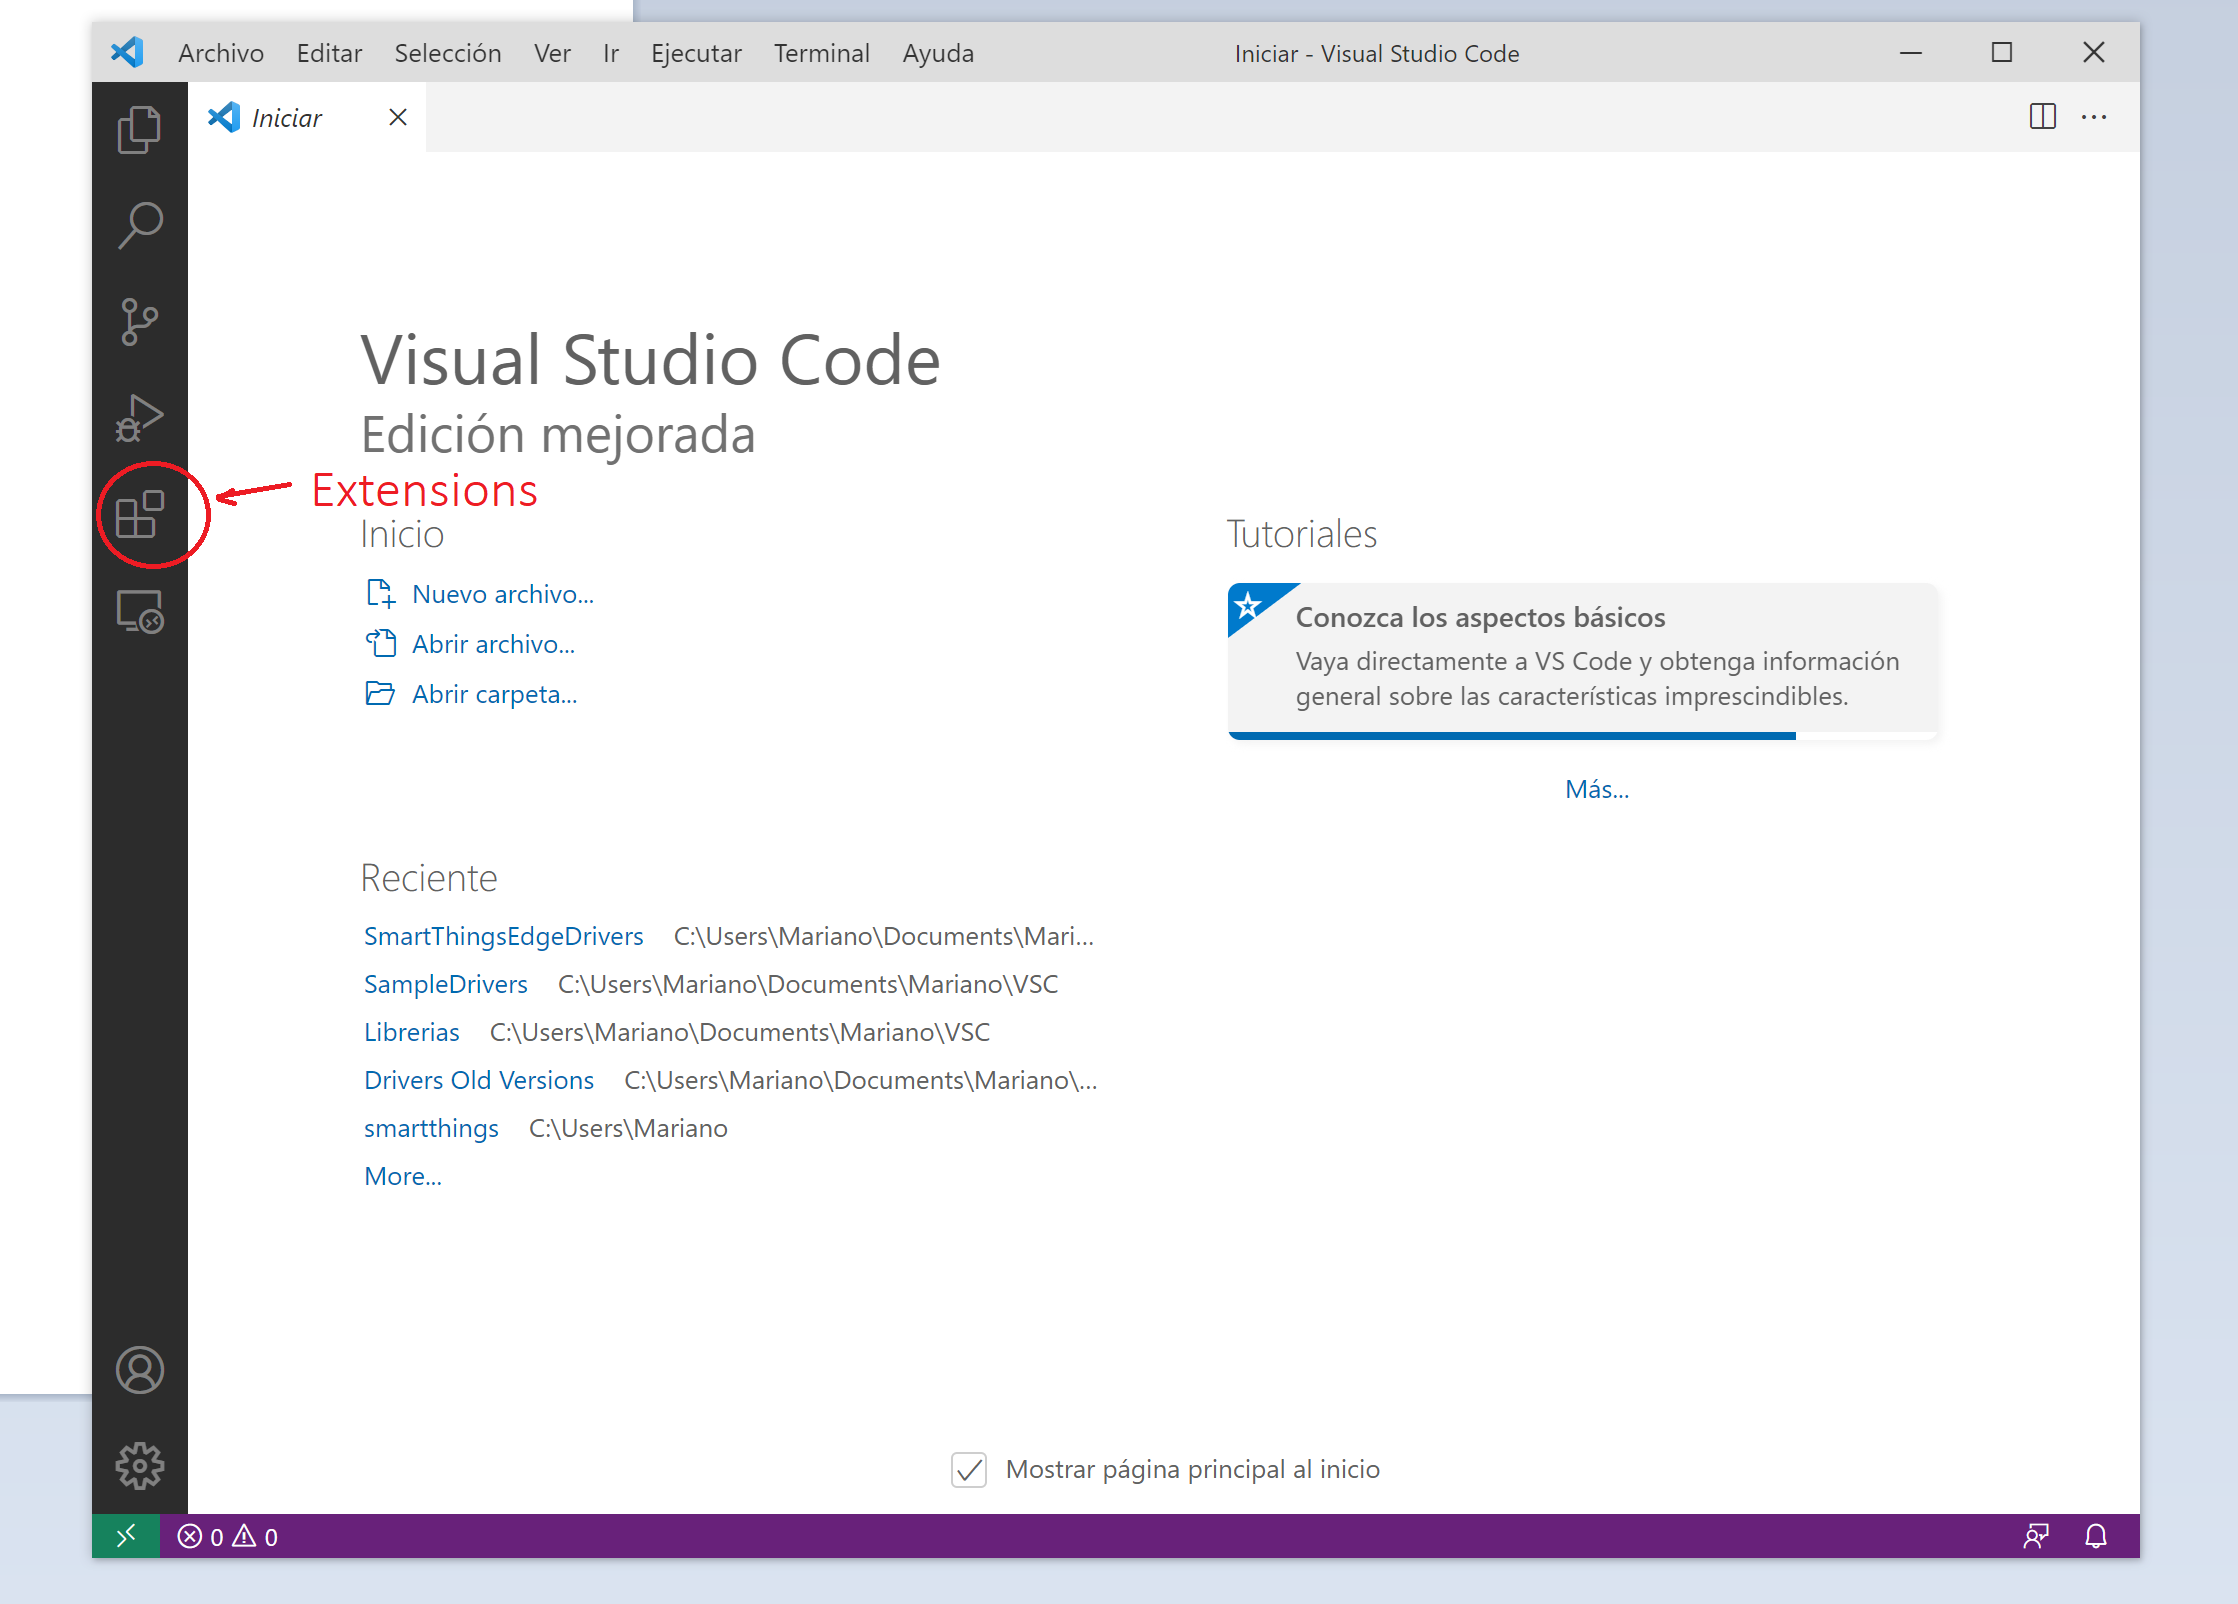
- Click on extensions to install the extensions to work with the LUA language, with syntax fixes and programming errors. With these that you see are enough for me

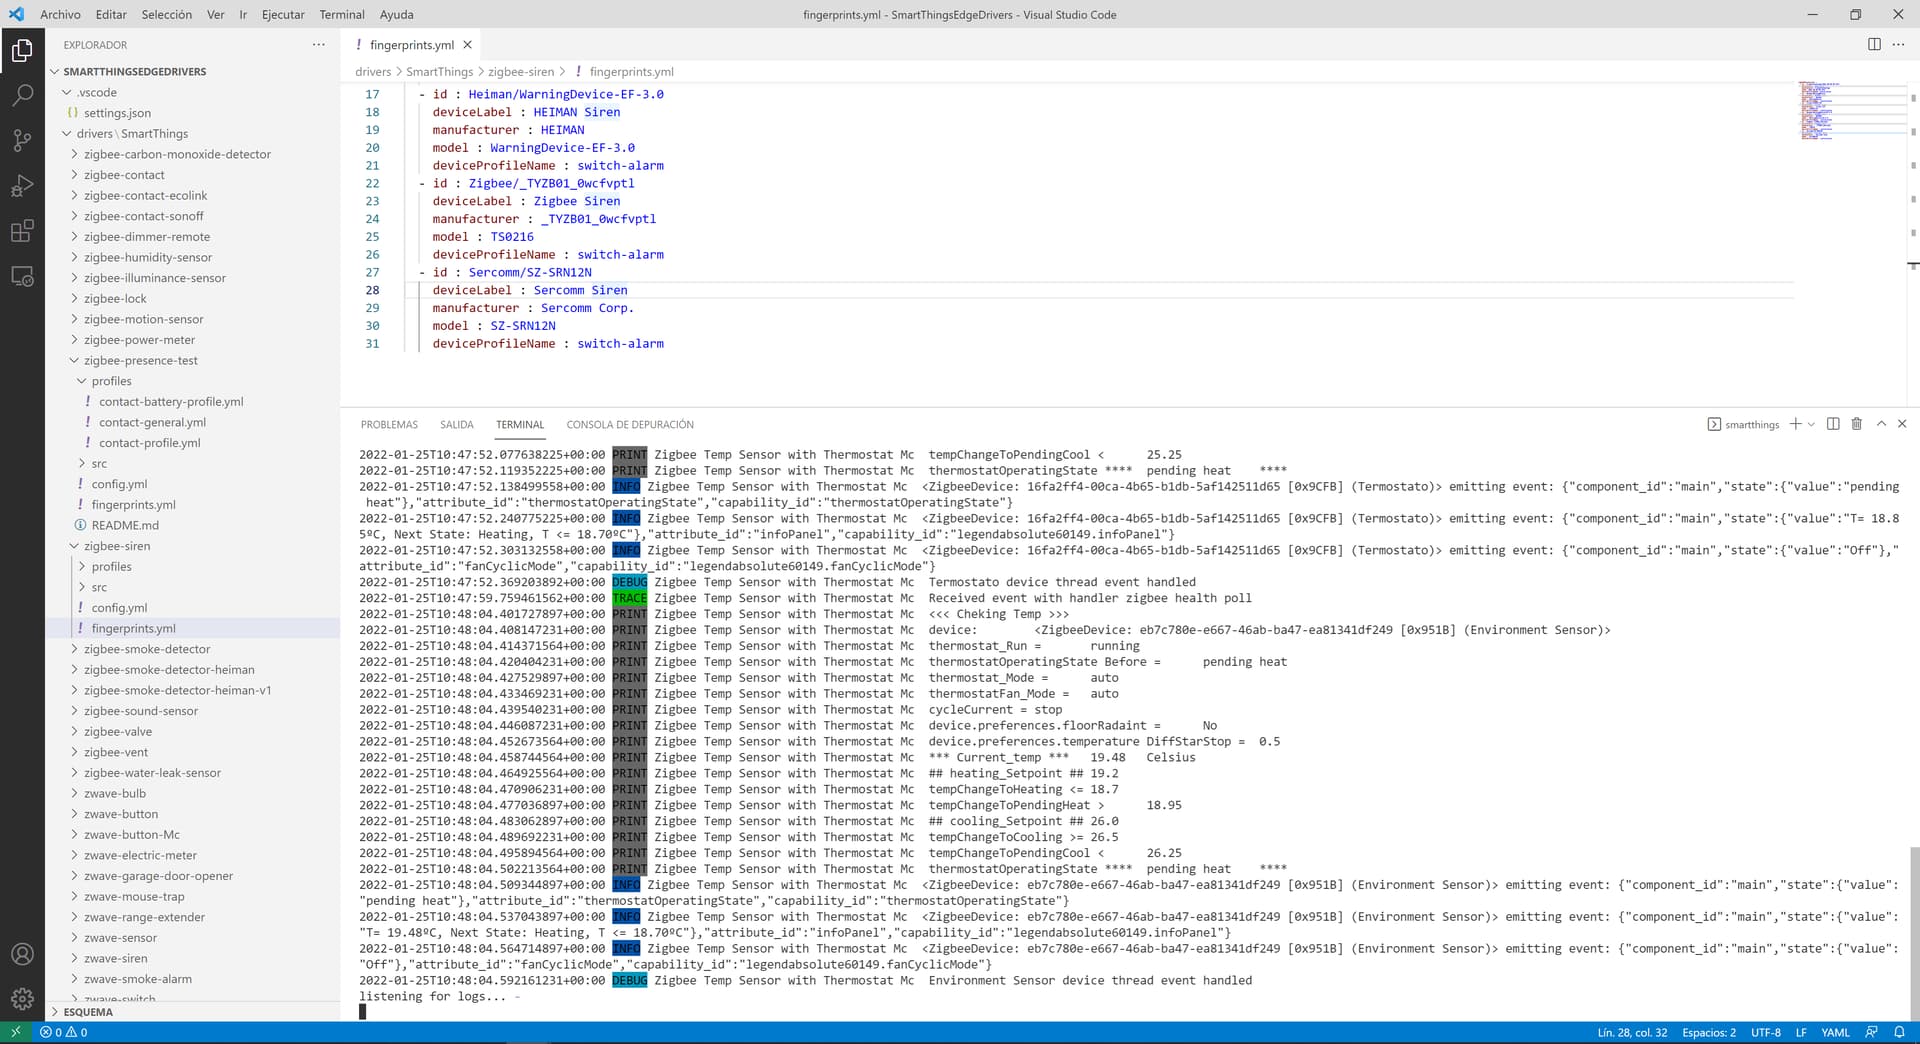
- This editor has integrated the Terminal, where we can use the CLI, to package, publish, view logs… create custom capabilities…
If you install the CLI in the same VSC editor directory, you don’t have to configure the terminal execution home directory in Visual Studio Code (VSC). In my case I configured it in editor settings.
- Once the extensions are installed, you have to download the code of the official beta drivers from the smartthings Edg drivers repository. You can synchronize with the github repository, I haven’t done it in this editor.
- The drivers are organized into folders that contain all the necessary files for each driver. Some useful information about the driver folders

This is the official tutorial.
- Install CLI on your computer:
• You have to download from this link release 34 of the compressed file smartthings-win.zip, if you use windows or the one necessary for your operating system
• In that link you also have installation help, use and all the commands you can use
• Unzip it and move the smartthings.exe file to a folder on your computer from where it will be used. for example to a new folder in documents/CLI
• You have to open the windows powerShell terminal window and you have to go to the directory (folder) where the smarttings.exe file is.
• Use the DOS commands “cd…” to move down directory and “cd directory name” to move to that directory. This is an example of my folder for CLI or VSC folder

• the first time you type a CLI command it will take you to the smartthing page to authorize your account.
• type .\smartthings edge:drivers:logcat
• enter the IP of your HUB, you can see it in IDE
• It will show you the list of drivers installed on your HUB
• type the number corresponding to the driver you want to see
• It will show you the activity of the device connected to that driver.
-
To modify an existing Driver
-
VERY IMPORTANT to create different versions of the driver. The Driver ID is unique:
10.1. Youcan create different versions of the driver with different IDs, which will look like different drivers
10.2. You can create driver versions with the same ID, which will look like a new version with a different date of the same driver and overwrite the previous version.
10.3. this is controlled with the config.yml file and the name and packagekey fields
name:  'Zigbee Switch Mc'
packageKey:  'Zigbee_Switch_v5'
permissions:
zigbee: {}
10.4. Name: It is the name with which the driver is created. Changes in this field does not change the driver ID, it only modifies the name and overwrites the previous driver
10.5. packageKey: This name is used to create the Driver ID. If you modify this field, versions of the driver with different ID are created, which will be seen as different drivers. You can use -v1… vx to create different versions without modifying the previous ones that already work well
- To only add new Fingerprints to the driver:
11.1. You have to open and edit the fingerprints.yml file
11.2. You will see that each device id is assigned a deviceProfileName
- id:  "LIDL Plug/TS011F"
deviceLabel:  Lidl Plug
manufacturer:  _TZ3000_kdi2o9m6
model:  TS011F
deviceProfileName:  single-switch-plug
- You have to check all the profile files, in the profiles folder, to verify which capabilities each profile has defined and see which profile fits your device.
12.1. Copy and paste a device group and modify it with your device’s data:
12.2. The id : Must be unique, there can be no duplicates
12.3. The manufacturer and model must be exact to the one shown in IDE
12.4. Assign the profile that best fits the capabilities of your device
12.5. This does not guarantee that your device will work, since it may need the execution of some subdriver, to show the battery voltage for example - Once the file is modified you save it and you have to create the new driver with the CLI, for example the driver with the code that is in the zigbee-switch-power-v2 folder
.\smartthings edge:drivers:package C:\Users\Mariano\Documents\Mariano\VSC\SampleDrivers\zigbee-switch-power-v2
You can copy the path of the containing folder of the code and paste it into the CLI command
- This generate the driver like this:
┌─────────────┬──────────────────────────────────────┐
│ Driver Id   │ f72a817f-7181-4538-8ef3-e932343a03de │
│ Name        │ Zigbee Switch Power Mc               │
│ Package Key │ Zigbee_Switch_Power-v2               │
│ Version     │ 2022-01-25T11:40:11.202738           │
- Publish it in the channel you want to use to distribute or install. Follow the CLI instructions
You must have created a channel to install your drivers, see tutorials
.\smartthings edge:channels:assign
-
Install the driver on your Hub and follow the cli prompts:
.\smartthings edge:drivers:install -
To capture the pairing log:
• Uninstall the device with the app
• Open the terminal window with the CLI ready to see the log of the driver to which the device is going to be paired
• In the app, add new device and search nearby
• When paired in the app you will see information appear in the CLI window
• When it finishes pairing, select the data in the window, copy and paste it in the post