Lutron Caseta Connect V1.5
This updated became larger than anticipated and required an update of the script, smartapp, and device handlers thus necessitating a full reinstall of your devices. I do apologize…
v1.5 UPDATES:
-
Non Dimmers should be recognized correctly and automatically install an appropriate device type. You must add the lutron-virtual-switch device handler from the github.
-
Two button Pico’s should also now be recognized and automatically install the correct DH as well. You must add the lutron-pico-on-off device handler from the github. (Thanks to @penner42 for your assistance here).
-
I revamped the Pico Remotes so the button numbering makes more sense. See the updated Pico image below for specific button numbers. Basically numbering now starts at 1 and goes to 5, or 1 and 2 for the 2 button Pico’s. I know this breaks existing integrations but I figured better to fix it now rather than later. The DH’s were updated to reflect this change.
-
I added the ability to control the ramp rate of a dimmer if you have a Pro hub. You can now turn off or on (to any level) your lights gradually over whatever time frame you wish from seconds to minutes. A full description of how to achieve this is below but note that it will require either CoRE (as shown) or a custom built SmartApp.
-
I tried to fix some of the issues with icons. (Thanks @BoSTon for pointing that out). I also prettied up the Service Manager with some icons. I would like to eventually add the ability to let the user pick the icon for each light separately (kind of like the Lutron app lets you) so you can have a different icon for recessed/fans/outdoor etc. Not sure if that is even possible yet. If anyone has icon suggestions let me know.
Unforunately these changes were drastic enough that they require a reinstall of the service manager after the update. The python script has also been updated. I had really wanted to minimize the need for this because I know that reinstalling is a giant pain, however due to my lack of foresight I had to go back and collect some data on devices that I wasn’t previously. If everything is working and you are happy just don’t update anything. I think moving forward this should become much less likely to occur.
Update Process: Simply update the SmartApp and all the DH’s in the IDE using the github integration.Don’t forget to add the new DH’s for the non dimmer Switches and Pico’s. Then get the updated python scipt, paste in your IP address at the top and run it. Finally install the smartapp from your device as before.
Thanks to so many who have tested my Beta Lutron Caseta integration and provided feedback (special thanks to @stephack) I believe it is finally time to take the beta tag off and provide a significant update. All code can be found on my github at: https://github.com/njschwartz/Lutron-Smart-Pi
What is it:
This project provides integration between Smartthings and you Lutron Caseta Devices. This works with both Standard and Pro model Lutron SmartBridge devices. It consists of a Smartapp, several device types, and a python script which must be setup and run on a server of some sort. I personally use a Raspberry Pi, however an always on PC or Mac can also be configured as your server. This integration allows full control of your Lutron Devices from within ST. You can turn lights on and off as well as control dimming, You can also add your scenes to ST and trigger them. Lastly, for PRO hub users ONLY you can add your Pico devices into ST and using an additional Smartapp, use them to control whatever ST device you wish.Setup
The setup consists of the following steps:
- Setup your Raspberry Pi/Server of choice
- Configure and Run the python script
- Install the device type handlers in the ST IDE
- Install the Smartapp in the ST IDE
- Configure the Smartapp on your phone or tablet
Setup your Raspberry Pi/Server
On your server you will need python 2.7 installed (This will not work with Python3) as well as the additional packages Twisted and Paramiko and ipaddress. There are guides online on how to get all of this setup. Additionally, there is a great deal of information available in the original beta thread: https://community.smartthings.com/t/beta-lutron-caseta-integration-using-raspberry-pi-pro-or-standard-bridge/62748/1 Assuming you have the python package manager installed you can simply type “pip install twisted” and “pip install paramiko” (paramiko has several dependencies which also need to be installed. Pay attention to any errors you might get when trying to install it). And “pip install ipaddress”,
Once these are all installed, create a folder on your server and place the LutronPi.py file into it. This file is located at my github: https://github.com/njschwartz/Lutron-Smart-Pi/blob/master/RaspberryPi/LutronPi.py Open the LutronPi.py file in a text editor and find the lines:

Edit these lines with the appropriate IP addresses for your ST hub and your Lutron SmartBridge. I HIGHLY recommend you give your device static IP addresses as IP changes will break everything.
Run the python script
If everything is setup correctly typing ‘python LutronPi.py’ should run the script and you will see some output on the screen. Give it a few seconds to make the connections and then adjust a Lutron switch and you should see additional output. From there just leave it running. If you SSH into your raspberry pi like I do you can run the script using ‘nohup python LutronPi.py &’ This will run it without showing all the output and will also not kill the script when you terminate the ssh connection to your pi. Make sure you test it first the other way though.
Note for Pro Hub users: You must go into the Lutron App and under Settings -> Advanced -> Integration check the box for Telnet Support in order to get the Pico Integration working.
Install the Smartapp and Device Type Handlers in the ST IDE
The simplest way to do this is by using the build in github integration as shown below. You can also copy and past the code from my github page: https://github.com/njschwartz/Lutron-Smart-Pi
![]()
There is one Smartapp and four device type handlers to install. Make sure you install AND publish them all or you will get errors.
Configure the Smartapp on your phone or tablet
Finally open the ST App > Marketplace > My Apps and find the Lutron Caseta Service Manager. Select it and then wait until it finds your server.

Select it and choose Next and wait until it finds all of your switches and Pico’s.

Select them and choose Next. Now wait for your scenes to appear and select the ones you want.

Hit Done and Done again. That’s it! At this point all your Caseta devices should be available in ST and available to control directly or via other Smartapps, CoRE, etc.
Pico Setup: The Pico’s will appear as a device in the ST list, however alone they cannot do anything. You need to assign the buttons to a function. The best/easiest way I have found is to use an app called Button Controller Plus. https://community.smartthings.com/t/release-button-controller-plus-hs-wd100-hs-ws100/48931
Pico Button Mapping: 
Adjusting Ramp Rates: A new capability called “rampLevel” has been added to the Dimmer Device Type. If you have a pro hub you can control the time it takes to turn on or off your Caseta lights. To do this in CoRE, create a piston and whatever If conditions you wish. For your then trigger select your Caseta Dimmer -> Add a task and choose “rampLevel”. You then need to enter two parameters. The first parameter is type number and is the level you want to change to (i.e. 0 for off 100 for full on or anything in between). The second parameter is a string with the format 00:00 for minutes and seconds. Thus 01:00 will perform the change over 1 minute. One caveat is for seconds <10 use the format 00:7 which will equal 7 seconds. For 15 seconds it would look like 00:15.
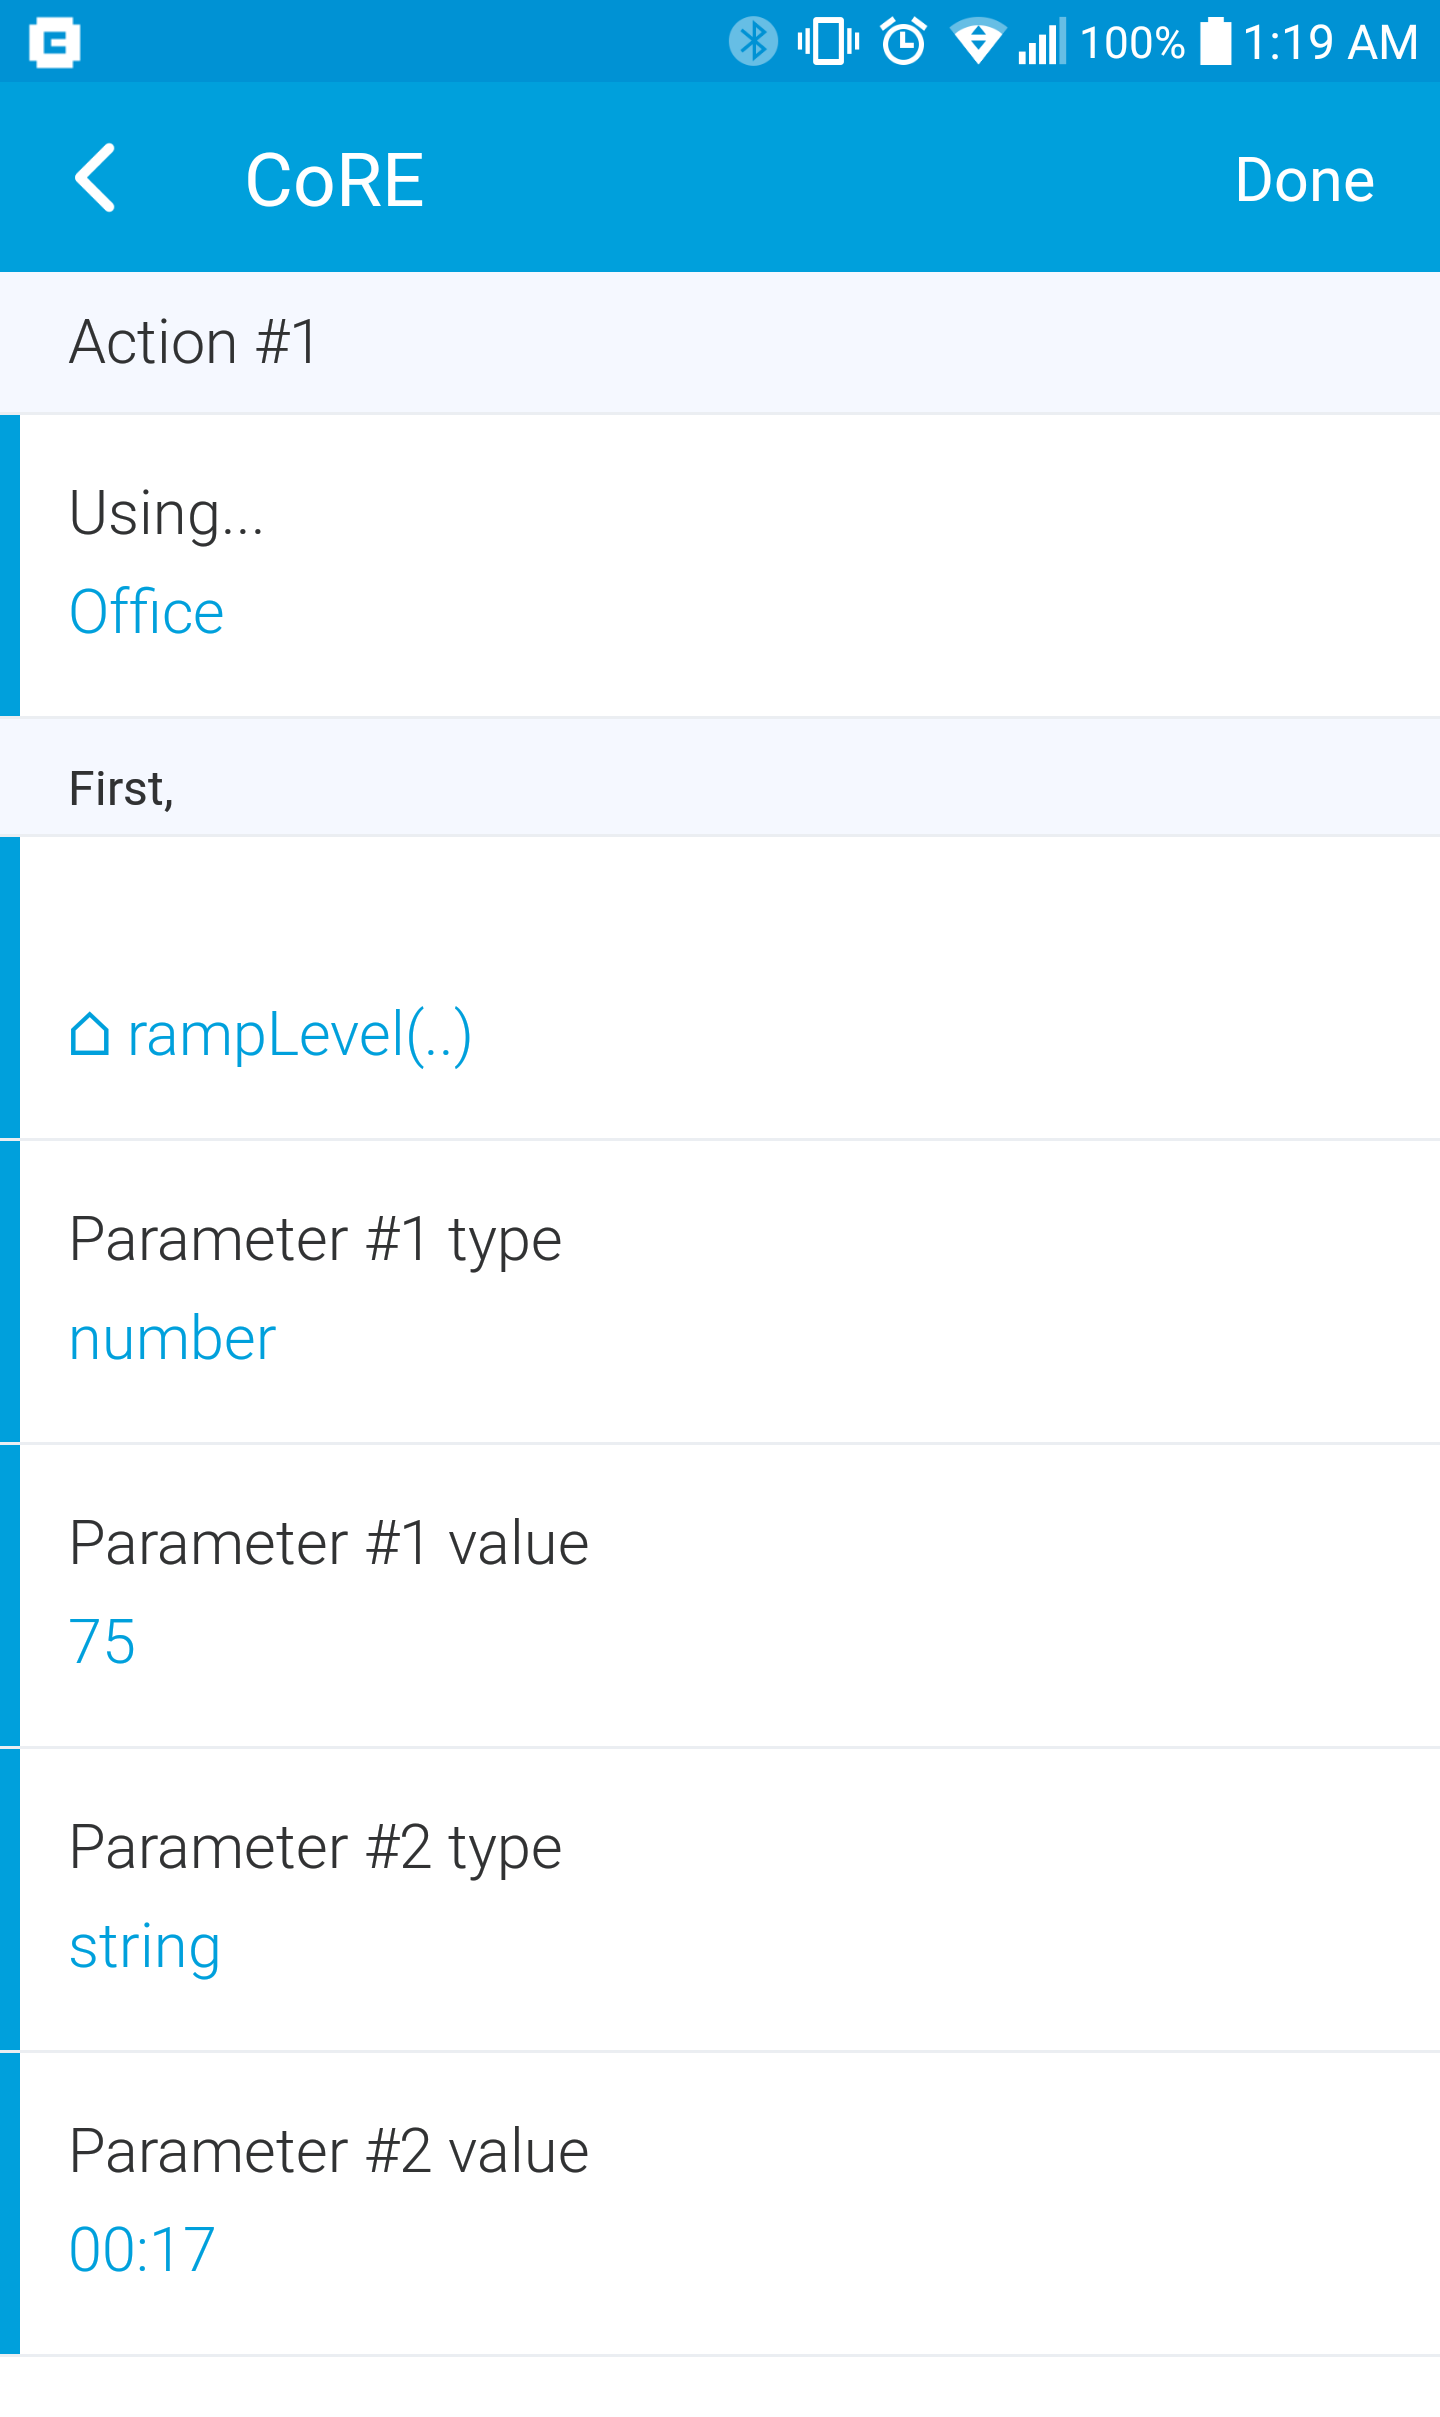

The above example will turn the Office lights to 75% over 17 seconds.
Please leave feedback and suggestions and thank you all for trying it out!

 Thanks for linking the other post.