fison67
March 20, 2018, 8:44am
1
Hi.
Simplify setup process for xiaomi devices to SmartThings.
You can control Xiaomi devices at SmartThings.
Lastest version. v.0.0.6.10
Support WiFi Devices.
Xiaomi Air Purifier ( zhimi.airpurifier.m1, zhimi.airpurifier.m2, zhimi.airpurifier.v1, zhimi.airpurifier.v2, zhimi.airpurifier.v3, zhimi.airpurifier.v6, zhimi.airpurifier.v7, zhimi.airpurifier.mc1, zhimi.airpurifier.ma2 )
Xiaomi Humidifier ( zhimi.humidifier.v1 , zhimi.humidifier.ca1, shuii.humidifier.jsq001, zhimi.humidifier.ca4, zhimi.humidifier.cb1, zhimi.humidifier.cb2, deerma.humidifier.mjjsq, deerma.humidifier.jsq, deerma.humidifier.jsq1 )
Xiaomi Vacuum ( rockrobo.vacuum.v1, roborock.vacuum.c1, roborock.vacuum.s5, roborock.vacuum.s5e, roborock.vacuum.m1s, roborock.vacuum.s6, roborock.vacuum.e2, roborock.vacuum.a10, roborock.vacuum.a08, viomi.vacuum.v6, viomi.vacuum.v7, kxf321.mop.mo001 )
Xiaomi Power Socket ( chuangmi.plug.v1, chuangmi.plug.v2, chuangmi.plug.v3, chuangmi.plug.m1 )
Xiaomi Power Strip ( qmi.powerstrip.v1, zimi.powerstrip.v2 )
Xiaomi Air Monitor ( zhimi.airmonitor.v1 )
Xiaomi gateway ( lumi.gateway.v3 )
Xiaomi AC Partner ( lumi.acpartner.v3)
Xiaomi Fan ( zhimi.fan.v2, zhimi.fan.v3, zhimi.fan.sa1, zhimi.fan.za1, zhimi.fan.za3, zhimi.fan.za4, dmaker.fan.p5, air.fan.ca23ad9, zhimi.fan.za5, zhimi.fan.fa1, dmaker.fan.p5, dmaker.fan.p8, dmaker.fan.p9, dmaker.fan.p10, dmaker.fan.p11 )
Yeelight Mono ( yeelink.light.lamp1, yeelink.light.mono1, yeelink.light.ct2, yeelink.light.mono2, yeelink.light.mono3, yeelink.light.mono4, yeelink.light.mono5, yeelink.light.mono6 )
Yeelight Color ( yeelink.light.color1, yeelink.light.color2, yeelink.light.strip1, yeelink.light.strip2, yeelink.light.color3, yeelink.light.color4, yeelink.light.color5, yeelink.light.strip3, yeelink.light.strip4, yeelink.light.strip5, yeelink.light.strip6 )
Yeelight Ceiling ( yeelink.light.ceiling1, yeelink.light.ceiling2, yeelink.light.ceiling3, yeelink.light.ceiling4, yeelink.light.ceiling5, yeelink.light.ceiling6 )
Xiaomi Bedside Lamp ( yeelink.light.bslamp1, yeelink.light.bslamp2 )
Xiaomi Philips Ceiling ( philips.light.ceiling, philips.light.zyceiling )
Xiaomi Philips Downlight ( philips.light.downlight )
Xiaomi IR Remote ( chuangmi.ir.v2, chuangmi.remote.h102a03, chuangmi.remote.v2 )
Xiaomi Heater (zhimi.heater.za1, zhimi.heater.za2, zhimi.heater.zb1, zhimi.elecheater.ma1, zhimi.heater.mc2)
Xiaomi Air Fresh (zhimi.airfresh.va2)
Xiaomi Dehumidifier (nwt.derh.wdh318efw1)
Support Zigbee Devices
Xiaomi Motion Sensor ( lumi.motion, lumi.motion.aq2 )
Xiaomi Door/Window Sensor ( lumi.magnet, lumi.magnet.aq2 )
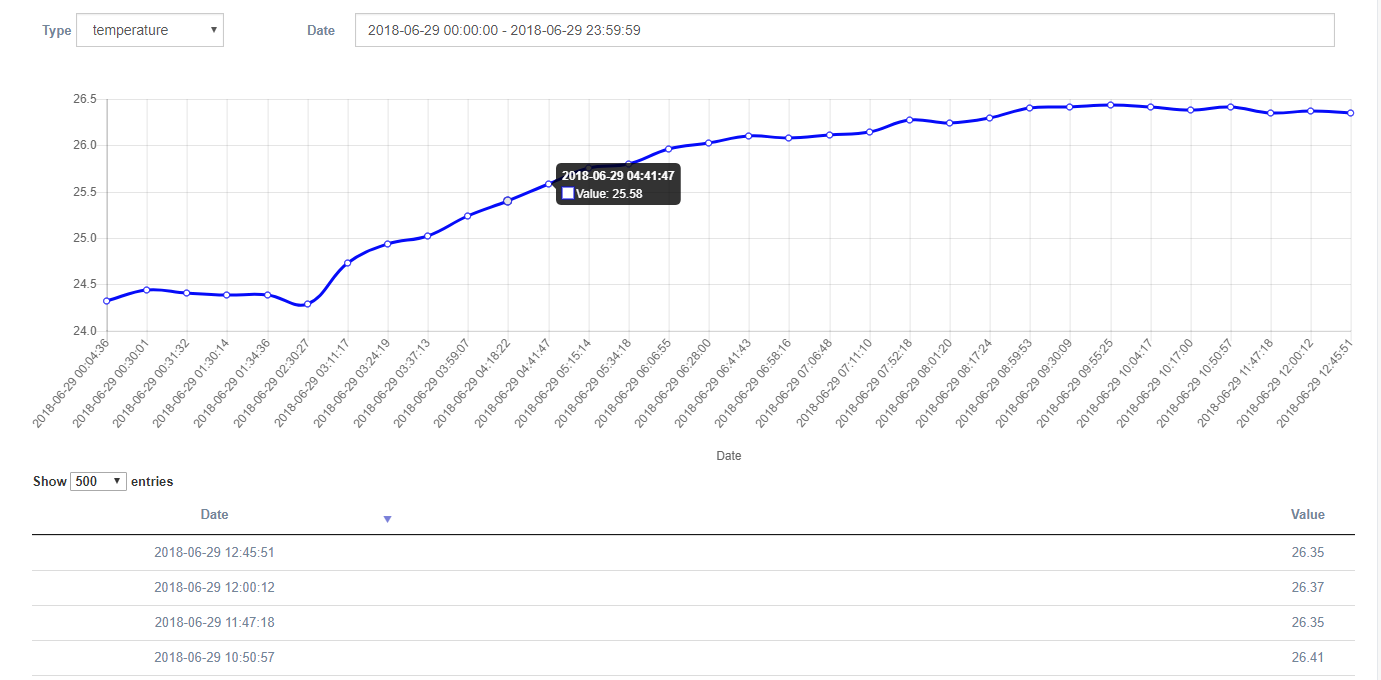
Xiaomi Weather Sensor ( lumi.weather, lumi.sensor_ht )
Xiaomi Power Socket ( lumi.plug )
Xiaomi Button ( lumi.switch, lumi.switch.v2, lumi.86sw1, lumi.86sw2 )
Xiaomi Cube ( lumi.cube )
Xiaomi Wall Switch ( lumi.ctrl_neutral1, lumi.ctrl_neutral2 )
Xiaomi Smoke Sensor ( lumi.smoke )
Xiaomi Gas Sensor ( lumi.gas )
Xiaomi Water Sensor ( lumi.water )
Xiaomi Curtain Motor ( lumi.curtain )
Xiaomi Vibration Sensor ( lumi.vibration ) [Only Beta Version]
Support Bluetooth Devices
Xiaomi Flora ( ble.flora ) [Only Beta Version]
Xiaomi Flora Pot ( ble.floraPot ) [Only Beta Version]
Xiaomi Temperature & Humidity Sensor ( ble.mitemperature ) [Only Beta Version]
Xiaomi E-Ink Digital Clock ( ble. einktemperature ) [Only Beta Version]
Donation
Sample Video
Screenshots
Yeelight Ceiling Lamp
Yeelight Light
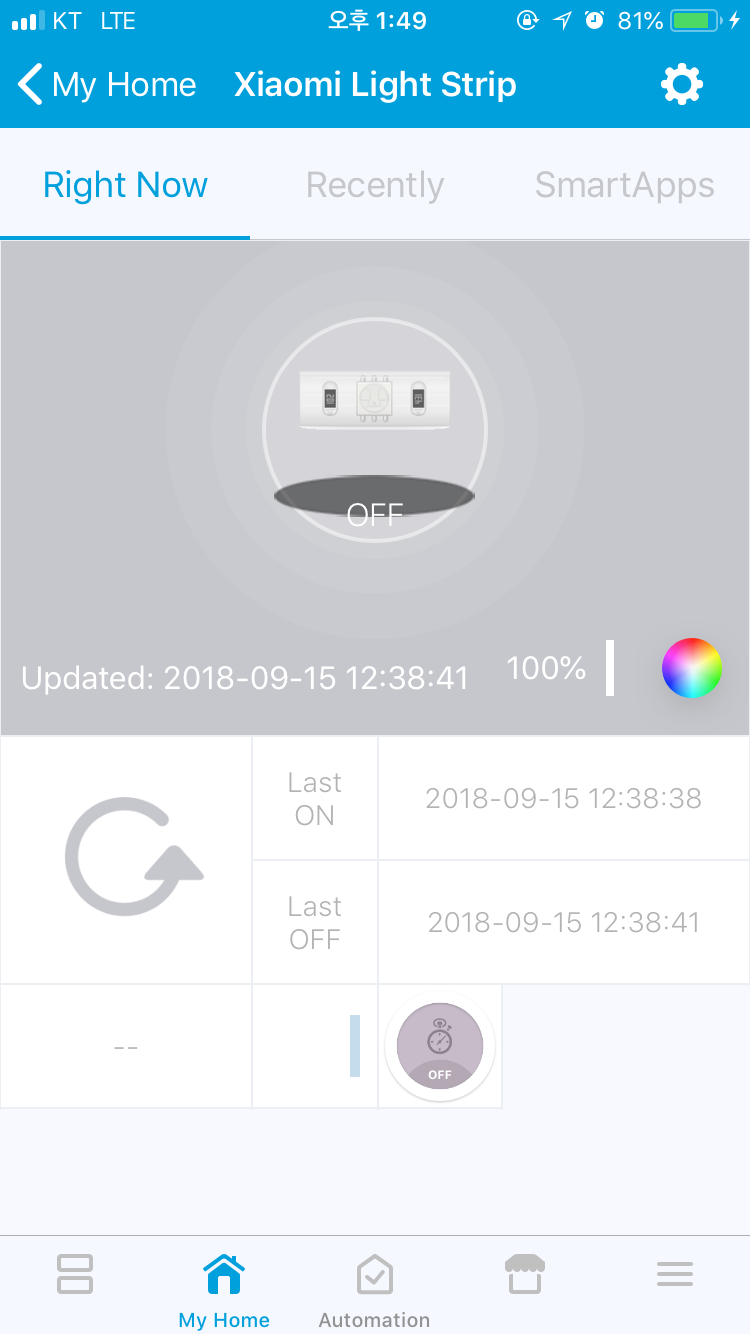
Yeelight Light Strip
Vacuum
Air Purifier
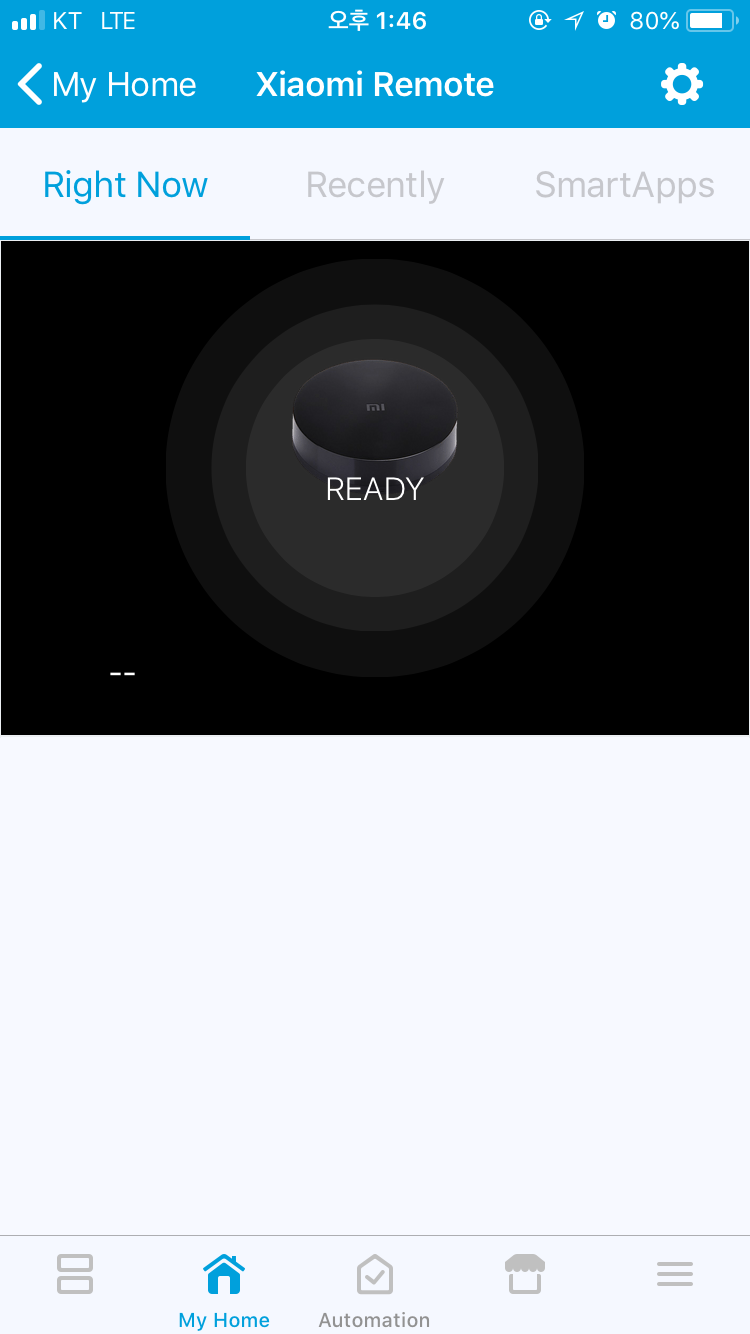
IR Remote
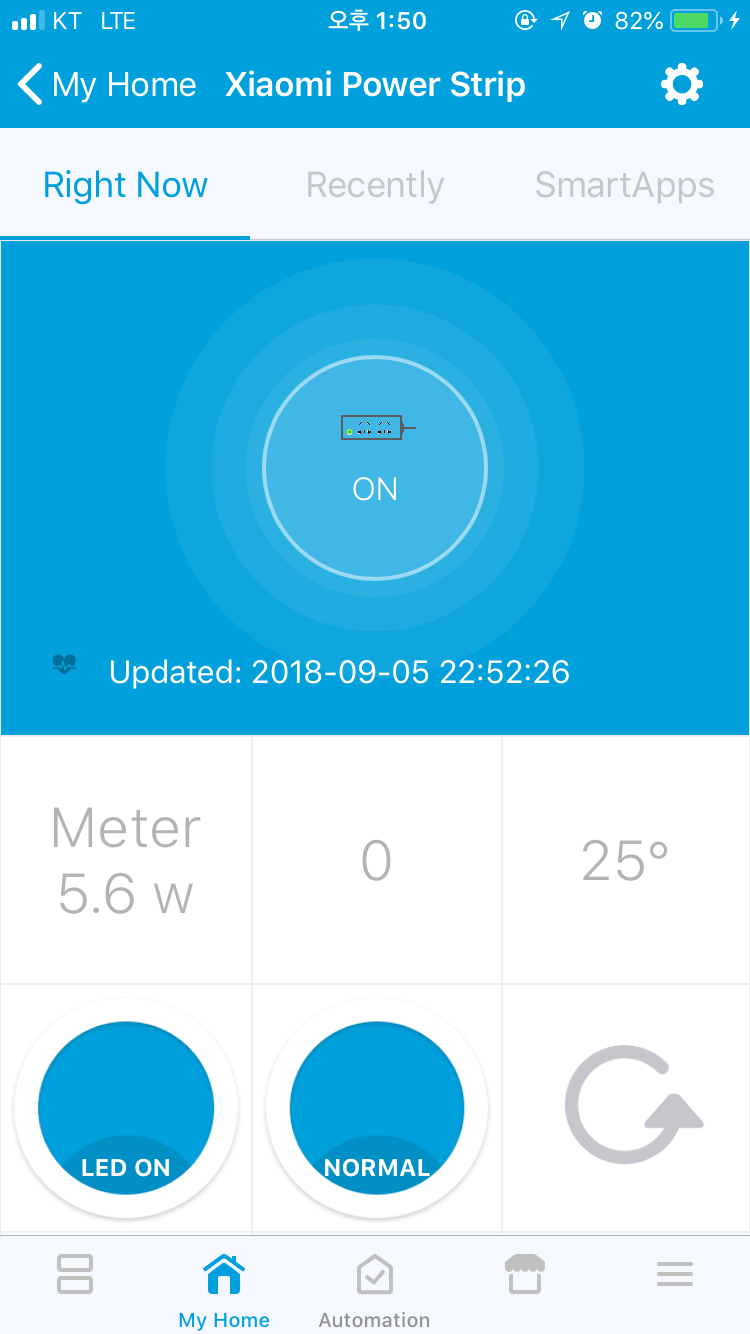
Power Strip
Zigbee Plug
Zigbee Motion
Zigbee Door
Zigbee Button
Bluetooth Flora
Bluetooth Weather
How to install
Install an API Sever & DB on docker of raspbery pi or synology nas
Install a Smartapp & DTH on Smartthings IDE
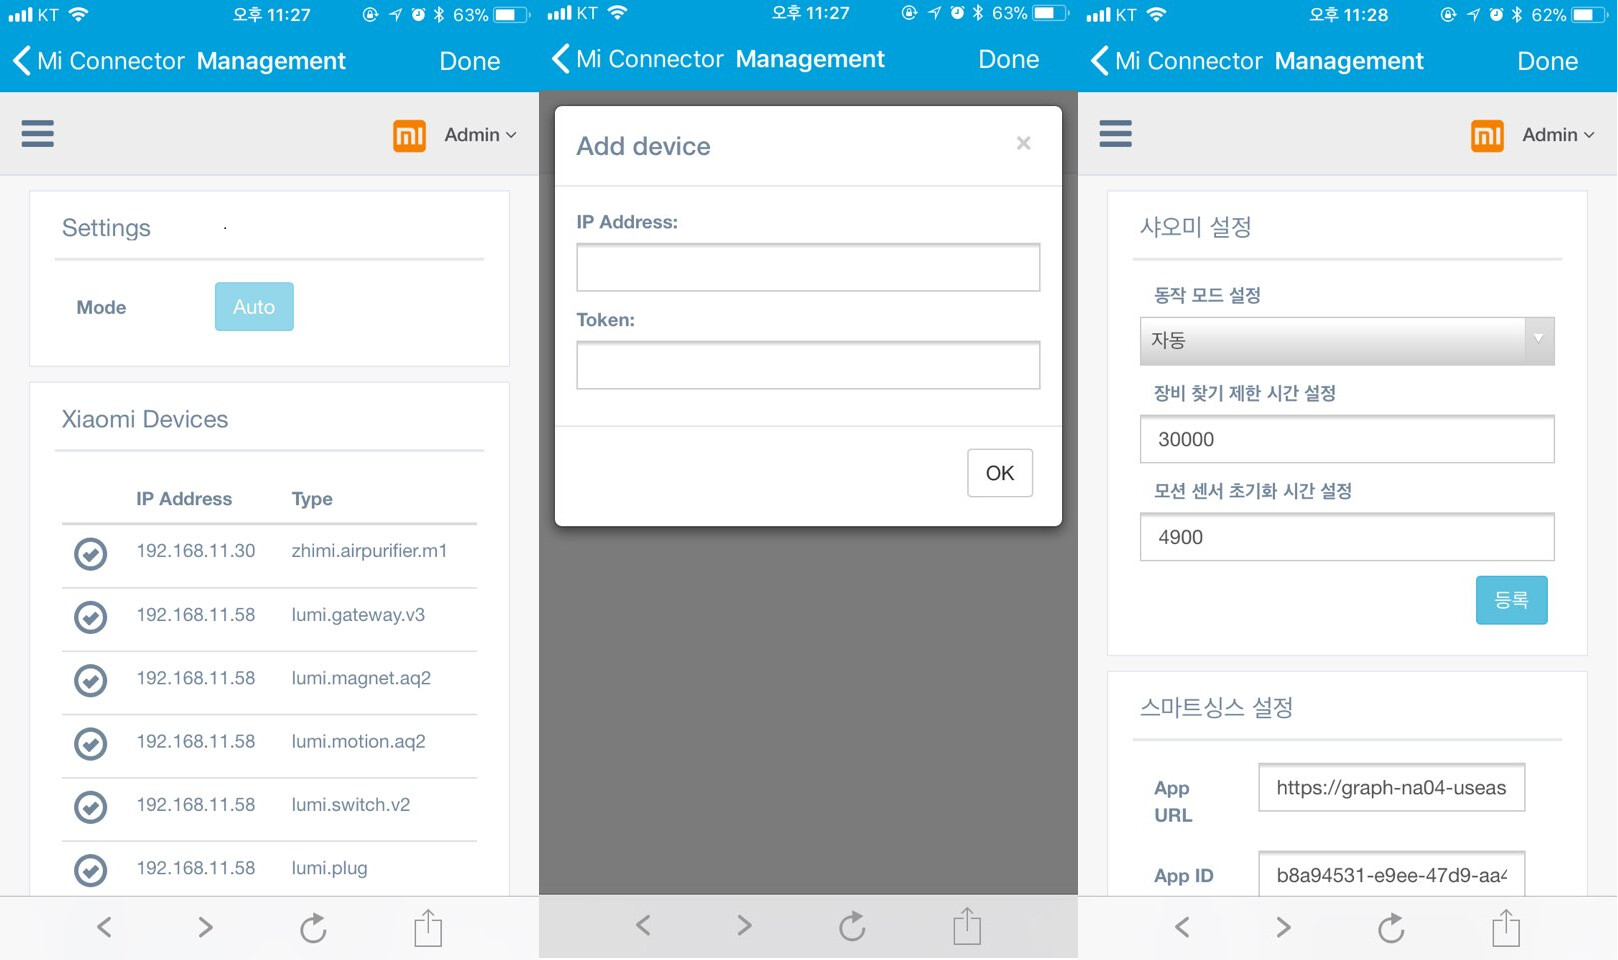
Install a Mi Connector Smartapp on the smartthings app.
Set local ip address in the blank.
26 Likes
veeceeoh
March 20, 2018, 4:00pm
2
Great work here, thanks for sharing!
Does access to the Xiaomi Gateway require local network function enabled in Developer Mode?
flyize
March 20, 2018, 4:19pm
3
Whoa, nice!!!
edit: Hmmm, I assume it’s non-trivial to get the API server running on DOcker x64?
fison67
March 21, 2018, 1:17am
4
According to miio library document,
Note To fully support the gateway this library will automatically enable the Local Developer API of the gateway. If it is already enabled the existing key is used but if not a new key is generated and set for the API.
I enabled Developer mode in Mi Home app myself
fison67
March 21, 2018, 1:32am
5
Sorry I don’t know what you are saying exactly…
OS Image is x86_64 in docker (fison67/mi-connector:0.0.1)
flyize
March 21, 2018, 12:37pm
6
Oh, so I should be able to install the Docker image on anything then? No requirement for an ARM processor?
flyize
March 21, 2018, 7:53pm
7
So I tried running your Docker container on Windows, but it just reboots over and over. I assume an ARM processor is required.
fison67
March 22, 2018, 1:27am
8
Is it possible to install Ubuntu docker image on Docker of Window OS?
Docker image is ubuntu. Maybe it’s not working.
fison67/mi-connector:0.0.1 -> ubuntu
flyize
March 22, 2018, 2:01pm
9
Ahhh, got it running with fison67/mi-connector:0.0.1!
Would it be possible to setup your repo so that it can be directly integrated with the SmartThings IDE? That way we don’t have to copy/paste each DTH.
As an example, once I’ve added this repo, I can just click on the DTHs I want installed.
Thanks for this work!
1 Like
ds4213
March 22, 2018, 5:56pm
10
good work!
fison67
March 22, 2018, 11:11pm
11
I made a new folder devicetypes.
1 Like
fison67
March 22, 2018, 11:20pm
12
I have no idea well…
But you don’t have to know that.
Just Mi Connector let you know what you have.
OhJungTae
March 23, 2018, 1:37am
13
GamSa Hap NiDa. Onaldo Ip Ni Da ^^
1 Like
flyize
March 23, 2018, 2:10pm
14
Excellent. Can you add a smartapps folder as well please?
edit: What is the default port for the Docker container? In your screenshot it shows port 30000, but that doesn’t seem to work for me.
1 Like
ds4213
March 23, 2018, 4:42pm
15
fison67:
nly a
Thanks, fison67.
unfortunately, I think i have v2 version as the gateway is not showing. (only xiaomi light in showing in my ST app)
another issue is i can see the Xiaomi power socket in the Management Web add device windows, however it is not showing in the device list?
Thanks in advance!
fison67
March 24, 2018, 12:32am
16
Defualt port is 30000.
your docker or host is using port 30000 already?
You can change port in config.json which is located shared folder.
fison67
March 24, 2018, 12:40am
17
Try to enable developer mode.
If you add gateway, sensors belong to gateway will be showed
I haven’t tested gateway v2 but miio library tells it’s possible.
If gateway is not showing… it means xiaomi connector can’t get token automatically.
Enable developer mode.
fison67
March 24, 2018, 12:49am
18
Menu Device list means manual device list.
For example mi connector can’t get token automatically, you add device manually that menu.
flyize
March 24, 2018, 3:42pm
19
I get nothing on port 30000. It’s not in use at all.
fison67
March 24, 2018, 5:54pm
20
What did you install?
You set this?