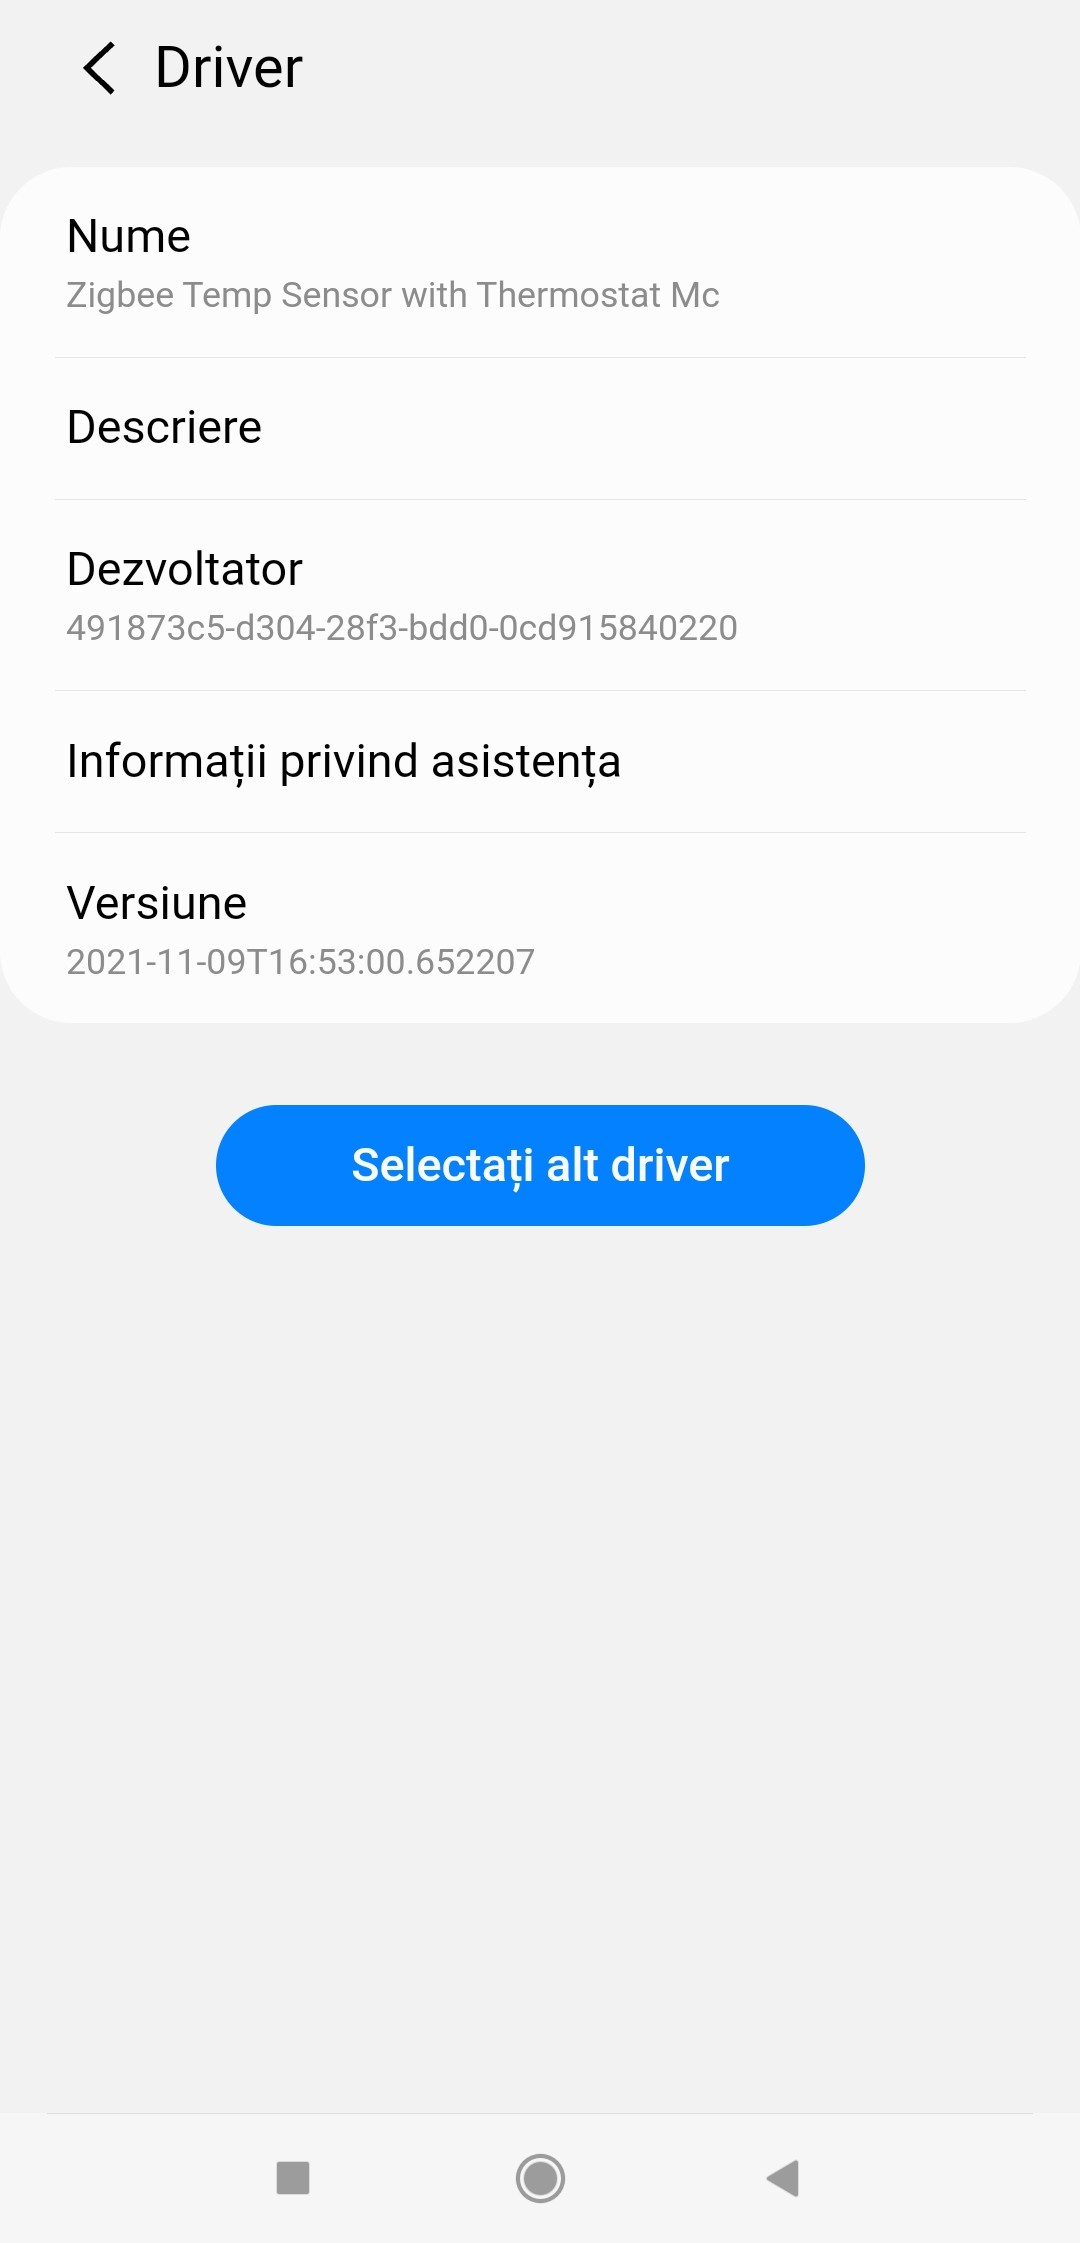
(NEW RELEASE): Edge Driver Zigbee TempSensor and Thermostat Mc:
Version 4.5 Thermostat Sensors Groups Control
Versions of Zigbee Temp Humidity Sensor Mc driver
This new Edge Driver allows you to convert a sensor that has the capability of Temperature into a fully programmable Thermostat that runs locally and usable with Routines and Scenes.
My thanks to @milandjurovic71 for his debugging work and for his always useful ideas and suggestions that it do possible build his idea of a fully operational virtual thermostat on the same driver.
Thanks also to @TAustin for helping me how make code for select which thermostat modes I want use and display.
Zigbee devices that have at least the Capability of TemperatureMesurement can be used.
This capability and all the others that the sensor has, motion, humidity, atmospheric pressure, contact … They have to use the Edge default libraries.
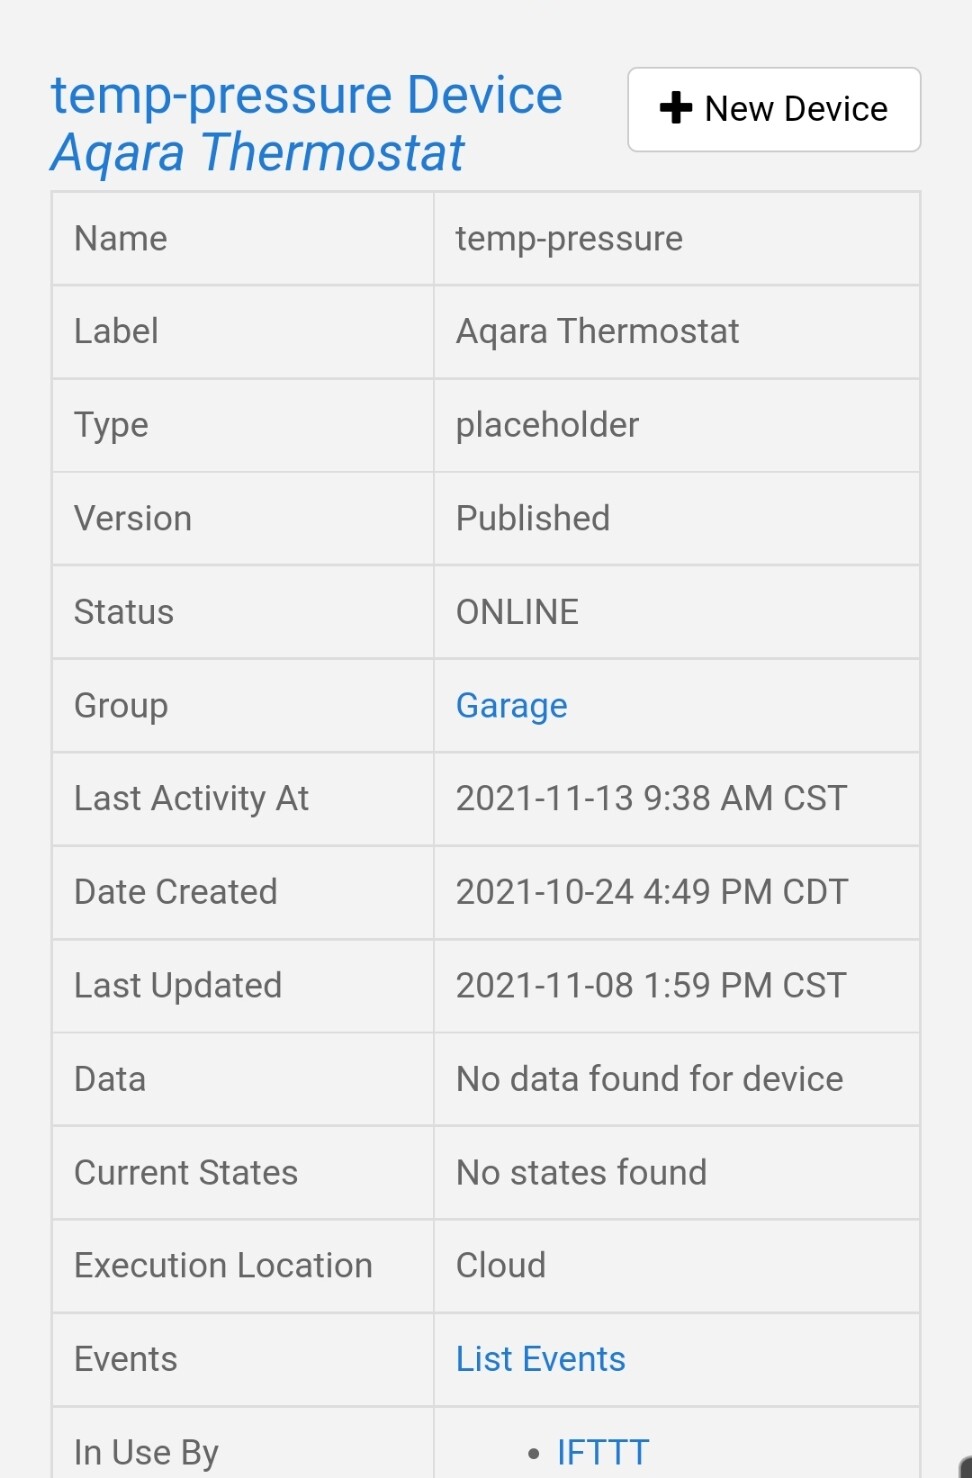
One Driver can control all sensors paired independently
For example, it has been tested with a SmartThings (Samjin) motion Sensor and Aqara Weather sensor.

In this link there is a complete manual.pdf for the installation and use of the virtual thermostat edge drivers.
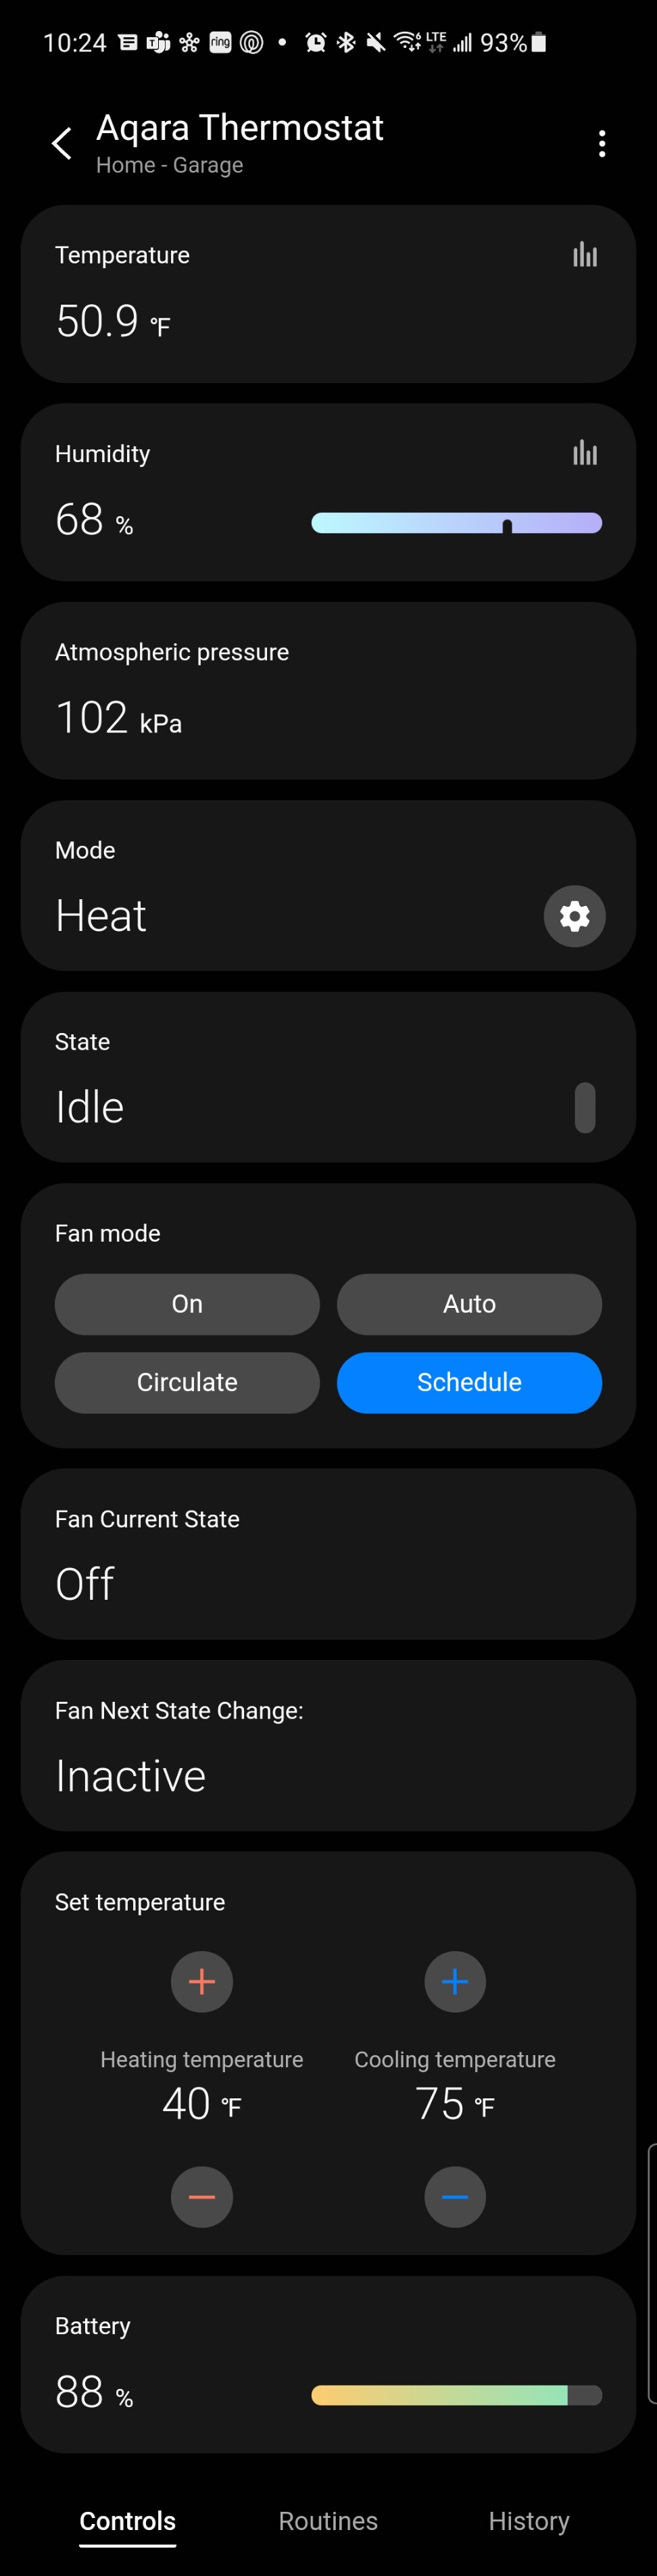
Thermostat Default Capabilities:
1. thermostatMode:
1.1. Asleep: Control Heat and Cool with Presets in Preferences for Heat and Cool Temperature
1.2. Away: Control Heat and Cool with Presets in Preferences for Heat and Cool Temperature
1.3. Auto: Control Heat and Cool with Presets in Heat Preferences for and Cool Temperature
1.4. Rush Hour: Control Heat and Cool with Presets in Preferences for Heat and Cool Temperature
1.5. Cool: Controls the temperature for Cooling with the set point entered manually.
1.6. Eco: Heat and Cool Control without Presets in Preferences for Heat and Cool Temperature
1.7. Heat: Controls the temperature for Heating with the set point entered manually.
1.8. Manual: Heat and Cool Control without Presets in Preferences for Heat and Cool Temperature
1.9. Off: Thermostat off. You can use fan On, Circulate, Scheduled modes

2. thermostatOperatingState:
2.1. Idle: Thermostat off, no temperature control
2.2. Heating: The current temperature is below the HeatSetPoint – Differential Temp
2.3. Pending Heat: The current temperature is above the HeatSetPoint – Temp Differential / 2
2.4. Cooling: The current temperature is above the CoolSetPoint + Temp Differential
2.5. Pending Cool: The current temperature is below the CoolSetPoint + Temp Differential / 2
2.6. Fan Only: Active Fan is selected and thermostat mode is Off
2.7. Vent economizer: Fan Circulate has been selected and the Thermostat Mode is Off.
3. thermostatFanMode:
3.1. Auto: Indicates that the fan will be activated automatically in the climate control.
- If thermostat state are Pending Heat or Pending Cool then Fan Current status go to OFF.
- If thermostat state are Heating or Cooling then Fan Current status go to ON.
3.2. On: The Fan will always be running in On mode.
- Fan Only will be displayed under Thermostat Status If Thermostat Mode is Off.
if thermostat mode is different from off the status for heat or cool is displayed
3.3. Circulate: The Fan will always be running in Circulate mode.
- Vent economizer: will be displayed under Thermostat Status if Thermostat Mode is Off.
if thermostat mode is different from off the heat or cool status is displayed
3.4. Followschedule: The Fan works with the on and off schedule according to the values, in minutes, chosen in preferences for Time On and Time Off. (Range between 1 and 60 min).
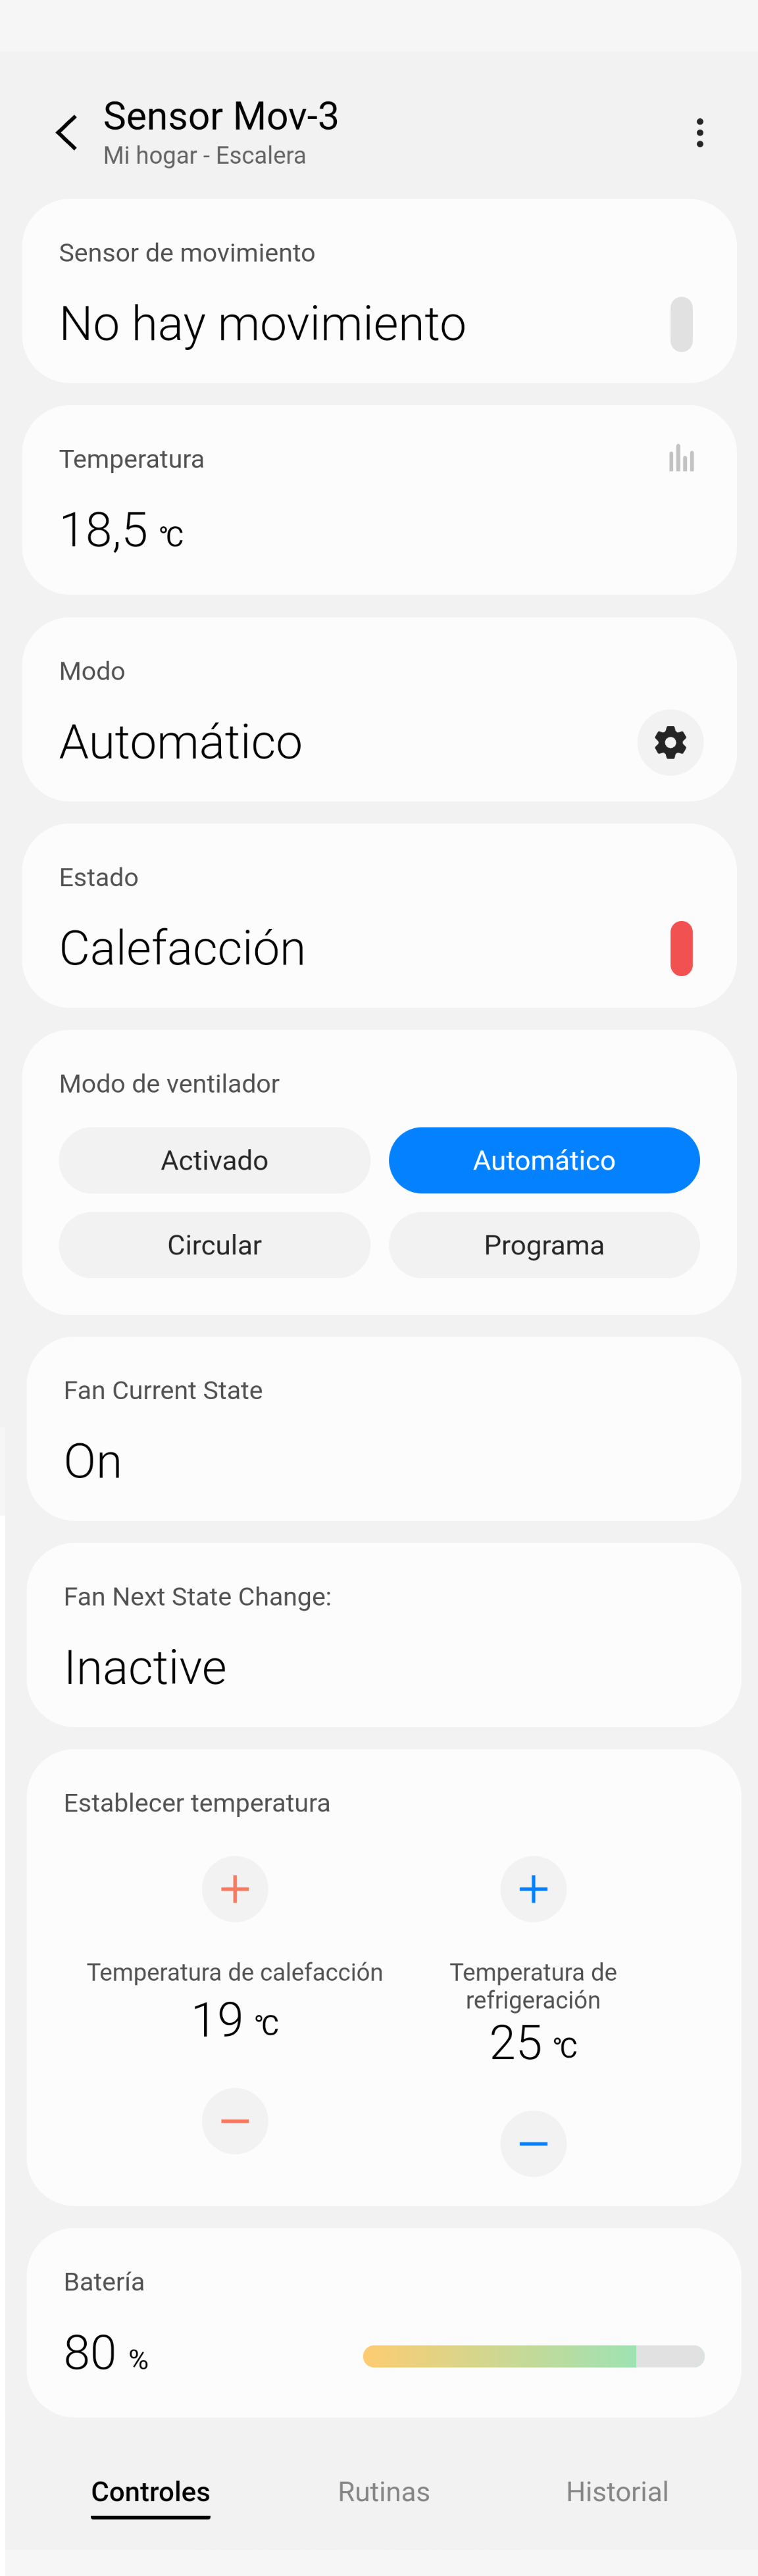
4. The Information Panels (Custom Capabilities):
4.1. Fan Current State: Indicates the Fan current Status On or Off, and can be used in Routines to activate fans, etc …
4.2. Fan Next State Change: Indicates the time at which the next scheduled Fan state change will occur.
To match your local time: Adjust the time difference with UTC time in preferences
4.3. Thermostat Next State Change Information: Displays information of the current ambient
temperature, with two decimal places and the next expected thermostat state change and the
temperature at which the change will occur

In preferences you can program the temperature preset values for 5 thermostat modes.
This allows you to program with simple routines to vary the desired target temperatures for different Hours of the Day or for situations such as, I am away or vacation.
Preferences settings to improve the comfort and save energy:
To improve energy savings and comfort it is necessary to introduce in preference settings the type of heating and cooling that the thermostat has to control and the thermal inertia of the installation.
What is the thermal inertia of the installation?: For our use, is the capacity of a heating or cooling installation to continue emitting heat or cold when the heating or cooling stops.
The thermal inertia is bidirectional, it takes some time for the thermal emitter to lose temperatura and it will also take some time to heat up with the heater.
For example, an installation with external radiators or underfloor, electric, with water or liquid, will continue to emit heat or cold until its temperature equals the ambient temperature, even if it is already stopped.
If installation is the underfloor heating and cooling type, the thermal inertia is very large, since the mass to be heated or cooled is very large.
If installation is heating or cooling by air has no thermal inertia. The hot or cold air is forced to circulate and begins to heat or cool instantly and when the system stops then Air stops circulating and quickly equalizes its temperature with the ambient temperature.
How to Use the Preference Setting: “Thermal Inertia of your Installation”
This simulates the acceleration resistance of real mechanical thermostats.
How to calculate Thermal Inertia of your Installation?
We will observe the history events and look for the temperature when thermostat Operating state change to “Pending Heat” state and then we will look for the maximum temperature following that event.
The difference between the maximum temperature reached and that of the event of change to “Pending Heat” is approximately equivalent to the thermal inertia of our heating system with the temperature conditions that we have fixed in the electric emitters, floor or water radiators.
Preference Values are in º in a range of 0º to 1.5º. The unit are in C o F, according to your selection in thermostat temperature unit in preference. Default value is 0.3º
The thermal inertia value is used to calculate the temperature to “stop” the heating or cooling, in order to no exceed or exceed as little as possible the temperature target in the set Point and improve comfort by saving energy.
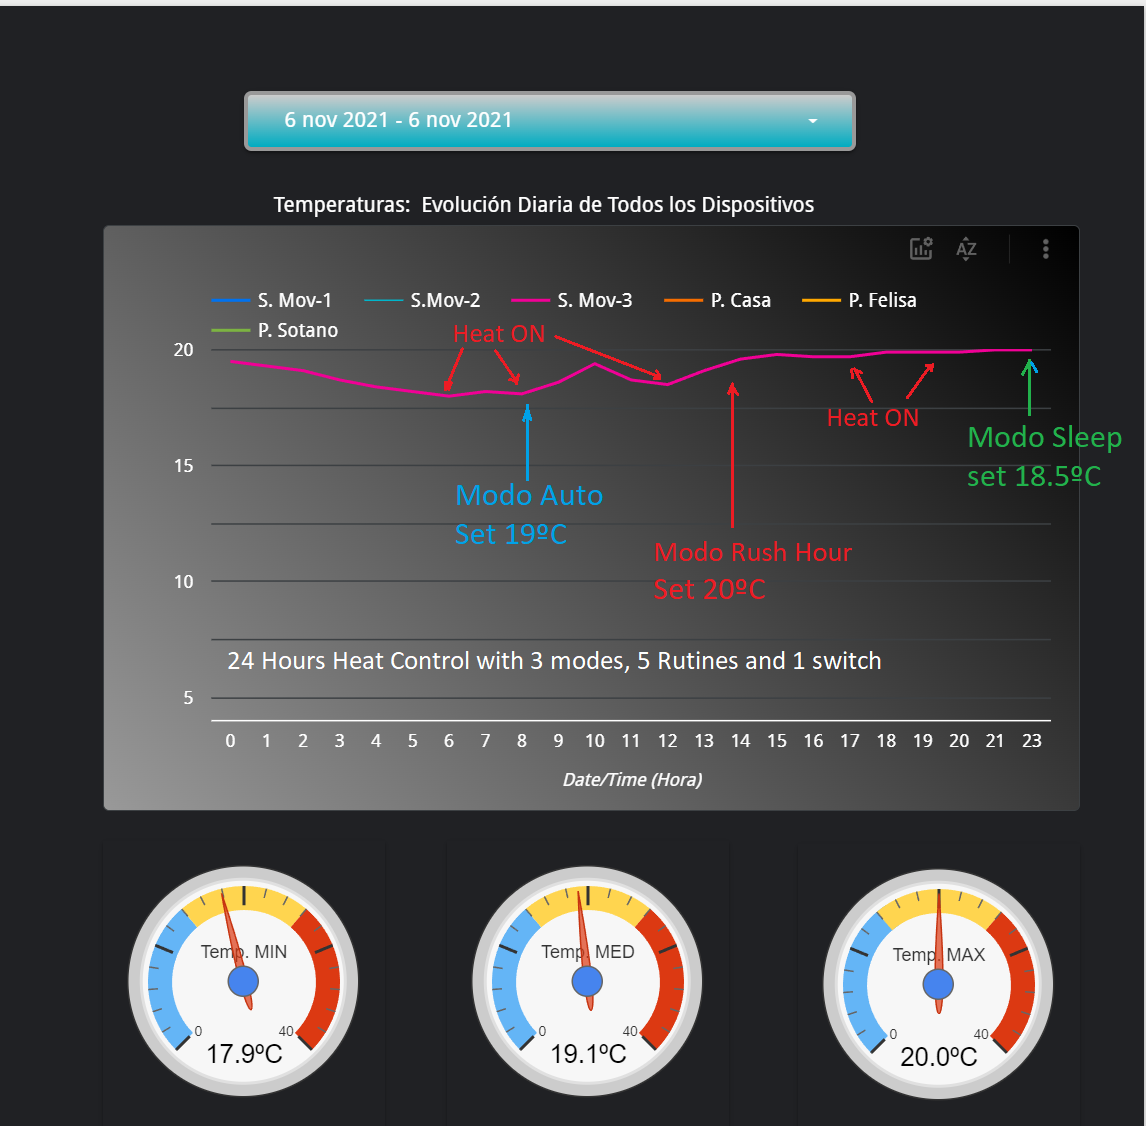
In Next Picture an Example of calculate with history events the Thermal Inertia for Heat set Point 19ºC:
- Temperature for Pending Heat state= 18.8ºC
- Max. Temperature after Temperature for Pending Heat state= 19.1ºC
- Heat Thermal Inertia with Radiator water Temp 55ºC = 0.3ºC
- Difference Set Point to Turn-On Temp = 0.6º aprox will be a good value

How to Use the Preference: “Select Your Heating and Cooling Type”
This preference is used to tell the thermostat what type of heating and cooling will be used so that it can calculate the heating or cooling ON and OFF temperature points.
- “Air for Heat & Cool”: Hot air heating and cold air cooling. This system is considered to have zero thermal inertia, regardless of the value entered by the user in the “Thermal Inertia of your Installation” preference.
- “Radiators for Heat & Air for Cool”: Heating by water radiators, electric ceramics and cold air cooling. Thermal inertia is used by subtracting it from the heating set point and zero value of thermal inertia is used for refrigeration.
- “Radiators for Heat & Cool”: Heating and cooling by water radiators. Thermal inertia is used by subtracting it from the heating set point and adding it to the cooling set point.
- “Floor for Heat & Air for Cool”: Underfloor heating of water or electric and cooling by cold air. Thermal inertia is used by subtracting it from the heating set point and zero value of thermal inertia is used for refrigeration
- “Floor for Heat & Cool”: Heating and cooling by underfloor heating of water or electric. Thermal inertia is used by subtracting it from the heating set point and adding it to the cooling set point.
Default value is “Radiators for Heat & Cool”

How to Use the Preference “Difference Set Point to Turn-On Temp”
This setting is used to calculate the starting and stopping of the heating and cooling and achieve an optimal comfort for each user.
Select the desired Maximum difference between Final Temperature Target (set Points) and Heating or Cooling temperatures to Turn On the system.
For example, if the heating set point is 20ºc and we choose a value Difference Set Point to Turn-On Temp = 0.6º, then when the ambient temperature in the thermostat is 19.4ºc, the state of the thermostat will change from Pending Heat to Heating to turn On the Heater
In my experience a valid value could be twice the thermal inertia of the heating or cooling system. If the thermal inertia = 0.3ºc, then the value Difference Set Point to Turn-On Temp = 0.6ºc approx will be a good value
Select a value between 0.3º to 4º. Default value is 0.6º
Values above 1ºc suggest low comfort
For underfloor heating installations , which have a very large thermal inertia and will also take longer to reheat or cool, the starting point is set at 0.15ºc below the stopping point.
For example, if the thermal inertia is 0.5ºc and the heating set point is 20ºc:
- The change point to Pending Heat will be: 20ºc - 0.5ºc = 19.5ºc
- The change point to Heating will be: 19.5ºc - 0.15ºc = 19.35ºc

Can see complete day temperature graphics in device details, and you can see the result of your automations and Temperature Set Points, in order to correct them if necessary to adjust the control to your needs.

When the device is installed for the first time:
- It may be necessary to restart the Hub as it has custom capabilities.
- The thermostat will not control the temperature until a first event of the current temperature is received. You can force an event by heating the sensor a little with your hand.
- The sensor works with the default settings of temperature reports:
Minimum Interval: 30 sec
Maximum Interval: 300 sec
Reportable temperature change: 0.1ºC
Important considerations:
- All sensors emit their reports inºC. As the maximum precision is 0.1ºC, the maximum precision in ºF will be 0.18ºF, which when rounded to 1 decimal place will be approximately 0.2ºF.
- The values of the temperature presets have no units and the defaults are equivalent to ºC.
- If your location use ºF, change the units to ºF in preferences and change the Heat and Cool values to equivalent values ºF.
- The range for entering temperature in preferences is -50.0 to 250.0.
- Decimal values can be used. this range covers the values required for ºC and ºF adjustments
- The range to change the set point temperature in the thermostat and automations is from 0ºC to 40ºC and from 32ºF to 104ºF, with increments of +/-1º. This is due to the default presentation of the capability. If smartThings changes it to be able to enter decimals and expand the range it would be an improvement.


The functions of the thermostat are updated every time a temperature change occurs in the real device or any manual change is made in settings or values in any thermostat capability.
My Beta Drivers Channel link
SmartThings. Add a little smartness to your things
List of supported devices Zigbee Temp Sensor with Thermostat Mc
List of supported devices Zigbee Temp Sensor and Child Thermostat Mc